
When someone subscribes to your list, AWeber can automatically pass their information (like their first name) to your thank you page as URL parameters. You can then display that information on the page to create a personalized experience.
Step 1: Enable “Pass Form Data” in Your Form Settings
-
Go to Sign Up Forms and select the form you want to edit.
-
Click the Settings tab.
-
Under Thank You Page, set the dropdown to Custom Page and enter your landing page URL.
-
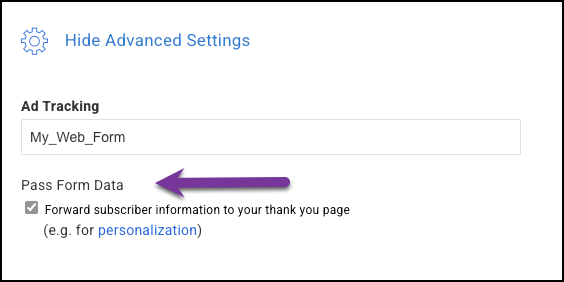
Click Show Advanced Settings.
-
Under Pass Form Data, check the box labeled Forward subscriber information to your thank you page.
-
Click Save Your Form.
AWeber will append subscriber data to your thank you page URL as parameters. For example: https://example.com/your-page?name=Sarah&email=sarah@example.com
Step 2: Add a Personalization Variable to Your Thank You Page
-
Go to Landing Pages and open your thank you page.
-
Click the text element where you want the subscriber’s name to appear.
-
Insert
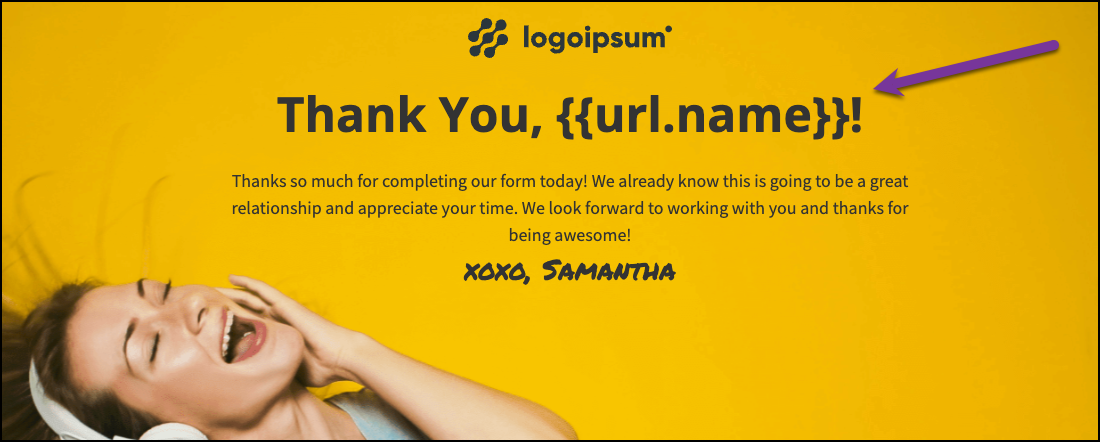
{{url.name}}where you want the name to display. For example: “You’re all set, {{url.name}}! Your guide is on its way.” -
Click Save.
Available URL Parameter Variables
The variables available to you depend on the fields included in your form. For example, if your form collects a subscriber’s name and email address, you may be able to use something like:
-
{{url.name}}— Subscriber’s first name -
{{url.email}}— Subscriber’s email address