
AWeber's AI Landing Page Builder creates a complete Landing Page from a single description. You describe the page you want in plain language, and the AI Landing Page Builder creates the layout, copy, images, and interactive elements around your goal. You refine your page through chat until it's right, then publish.
Because the AI Landing Page Builder is built into AWeber, every page is connected to your list from the first signup on.
Note: The AI Landing Page Builder is currently in beta and is available for all accounts. Features and screens described below may change as the builder is updated.
Step 1: Open the AI Landing Page Builder
-
Visit the AI Landing Pages tab
-
Click Create a Landing Page.
Step 2: Describe Your Page
Use the chat on the bottom left and describe what you want in your own words. One clear sentence is enough to generate a first draft, and you'll refine it from there. If you don’t know what you want, ask the chat for ideas!
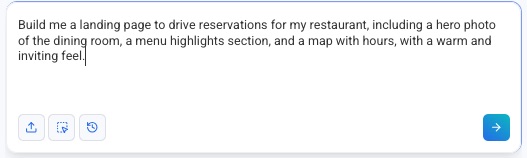
Tips for a strong first prompt:
-
Lead with the goal. Tell the chat what the page is for: growing your list, selling a product, taking bookings, promoting an event, or collecting leads. The builder structures the page around that action.
-
Name the sections you care about. Mention specific elements like a hero image, countdown timer, testimonials, FAQ, or signup form, and the builder includes them.
-
Describe the feel. Words like "clean and minimal," "bold and colorful," or "professional" help set the visual direction.
-
Be specific. If there is a particular look, feel, or element you want included on your page, make sure to include that context in the chat so the builder can create your page with those expectations.
-
Include a link to your website. If you want a page styled based on your branding on your website, include a link to your site so that the page can match your branding.
Building from a page you already like
If you've seen a page elsewhere that you want to model yours on, take a screenshot and drop it into the chat. The builder will create a page in that style using your own brand and content. Providing a screenshot is currently the most reliable way to reference an existing design.
To add a screenshot, simply click the upload button in the bottom left of the chat window.
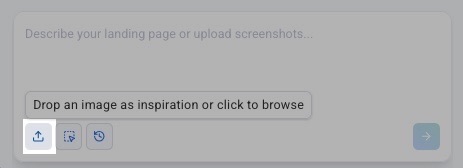
You can also ask the chat to reference a web address (URL) so it can pull styling and content from an existing page. URL referencing works but can occasionally be unreliable; if the chat has trouble reading the URL, use a screenshot instead.
Importing a page from another tool
If you've already generated a page in a tool like Claude, ChatGPT, or Gemini, you can bring that page into AWeber and host it here. Paste in a screenshot of the page or its code, and the AI Landing Page Builder makes it editable and ready to publish.
Step 3: Refine Your Page
You can shape your page two ways: by asking in the chat, or by editing directly on the canvas.
Refine through chat
Type follow-up requests in the chat panel and the builder makes targeted changes without rebuilding the whole page. For example:
-
"Add a countdown timer above the form."
-
"Create an image of my product on a nice background."
-
"Redirect to my booking page when someone subscribes."
-
"Change the order of the sections to lead with the testimonials."
-
"Make the headline shorter and more direct."
-
“Tag subscribers when they sign up on the form”
Generate and edit images
The builder can also create and edit images for you. For example, it can create a hero image built for your specific page, change the lighting or background of an image, or place your product into a scene. Just describe what you want.
Edit directly on the canvas
You can also make manual edits on the page itself by clicking the “Edit” icon at the top of the page or the edit icon at the bottom of the chat.
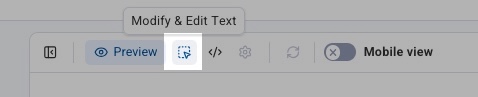
From the edit menu, you can:
-
Edit text: Click any text and type in-line. Use the formatting bar to adjust fonts and styling.
-
Move elements: Hover over an element and drag it to a new position.
-
Delete elements: Hover over an element and click the delete icon.
Elements you can add
Because the builder can generate custom interactive content, you're not limited to a fixed set of content. You can ask it to build things like countdown timers, spin-to-win discount wheels, and simple interactive tools such as calculators and planners used as lead magnets. If there’s anything you want added to your page, ask the builder, and it will attempt to build it.
Testing Mobile View
Your Landing Page automatically adjusts to fit mobile screens, so it's ready to view and share as soon as you publish. To see how your Landing Page looks on a phone or tablet, select the mobile view option at the top of the editor.

If anything needs to be changed in the mobile view, such as the padding, spacing, or formatting, ask the builder to make those changes. Be specific about exactly what needs to be changed, or provide a screenshot of the issue, so the builder can properly identify and make any needed changes.
Version History: Undo and Restore Changes
Version history automatically saves your Landing Page as you work, giving you access to the last 10 autosaved versions. If you make a mistake or need to undo changes, you can restore any earlier version in just a few clicks, so you can experiment freely without worrying about losing your work.
To access your page’s version history, click on the version history icon at the bottom of the chat window.
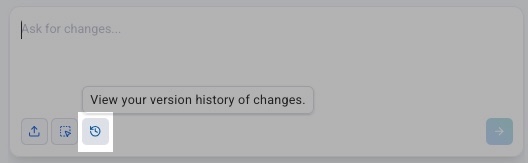
When viewing your version history, you can click on any of the versions on the left side of the screen to view that version of the page. You can restore or bookmark any version by mousing over them and clicking on the text ‘restore’ or the bookmark icon.
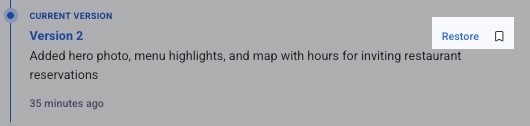
Bookmarking a version lets you save it for easy access later, so you can quickly return to that specific version without scrolling through your recent version history.
Note: a bookmarked version still counts toward your 10 available version slots.
Step 4: Set Up Your Landing Page’s Signup Form
The form on your page is what turns visitors into subscribers. Every page you publish connects to your AWeber list automatically. By asking the AI agent in the chat, you can:
-
Add or remove form fields as needed.
-
Customize the submit button text.
-
Change colors or styling.
-
Set up what happens after someone submits (for example, a thank-you page).
-
Apply tags to the form if you want to segment subscribers or trigger a Workflow when someone signs up.
When a visitor submits the form, they're added to your list immediately and enter any automation you've connected, with no separate Landing Page tool and no integration to maintain.
Step 5: Configure Your Publish Settings
Click the settings icon at the top of the editor to open the publish settings for your Landing Page.

-
Preview URL: A read-only display of your page's full published address. It updates live as you change the domain and path below.
-
Domain: Choose where the page is hosted:
-
AWeber Subdomain: the default AWeber-hosted address (an
aweb.pageURL). -
Custom Domain: select a custom domain already connected to your account, or connect a new one from the bottom of the domains and addresses page.
-
-
Custom Page Path: Set the slug (the part of the URL after the domain) for your page. For example, if your domain is http://www.example.com and your page path is "spring-sale," your page's full URL would be www.example.com/spring-sale.
-
Selecting “Set as homepage” will remove the page path to use the root domain (like http://www.example.com/ ). Only one page can be set as the homepage.
-
If you change the page path or domain, make sure to re-publish the page.
Step 6: Publish Your Page
-
When your page is ready, click “Publish” in the top right of the editor.
-
Your page goes live at the URL shown in your publish settings. The full page URL will also be listed in the AI Landing Pages tab in your account.
-
Share the URL anywhere: social posts, ads, your email campaigns, or your site.
Every sign up that comes through your published page becomes a subscriber in your AWeber list right away, connected to any tags and automations you've set up.