
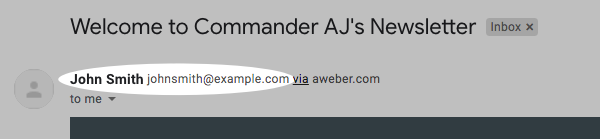
Your From address is the email address that will show as the sender when subscribers receive your messages, like in the image below.
The From address is one of the first things that subscribers will see when they receive your messages, so we recommend using your own custom domain and something that your subscribers recognize, like yourname@yourdomain.com. You would need to avoid using a free email address from a provider like Gmail.com, Yahoo.com, Aol.com, or Hotmail.com. This will also be where you receive replies from your subscribers, so you want to make sure it is a valid email address that you have access to.
The From address is an important part of your deliverability. When you use a custom domain, you can add to your DNS settings, which help authenticate that AWeber is allowed to send on your behalf.
In order to update your DKIM records for your domain, you will first have to verify whatever email address you're planning on using. In this article, we will walk through the steps to verify your From address.
Please Note: Upon verifying your email you will have no limitations when sending test messages to that verified email.
Step By Step Instructions
-
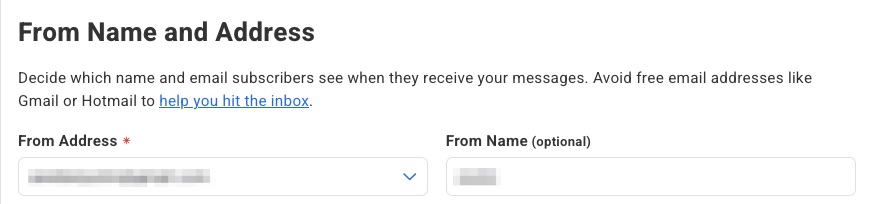
First, hover over the "List Options" tab and click "List Settings." You will see your From name and email address in your "Basic Settings."
-
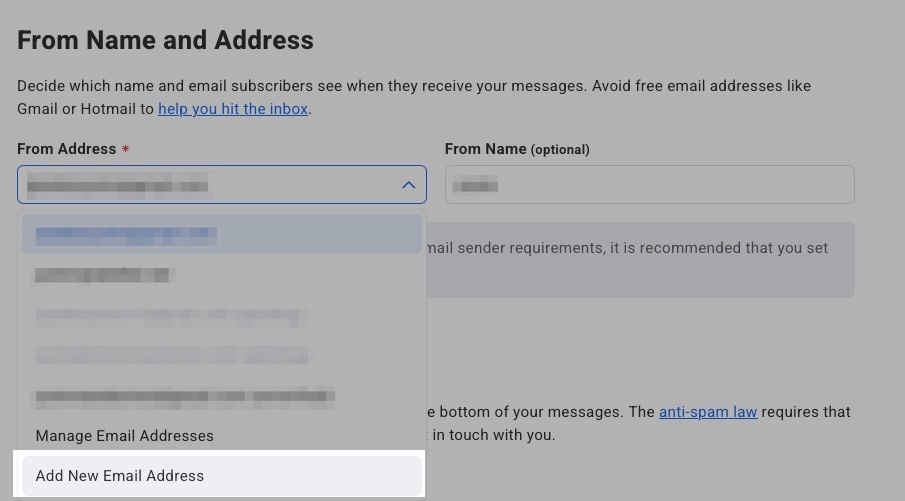
To add a new email address, select “Add New Email Address” in the From Address dropdown.
-
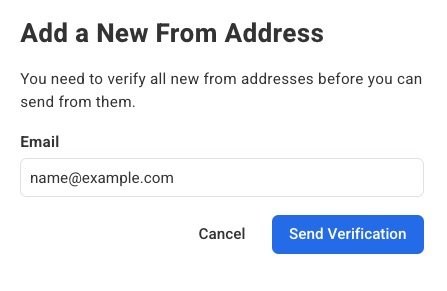
A slide-in panel will display allowing you to enter your email address. Once the email address is entered, click “Send Verification” to send a verification email to this email address.
-
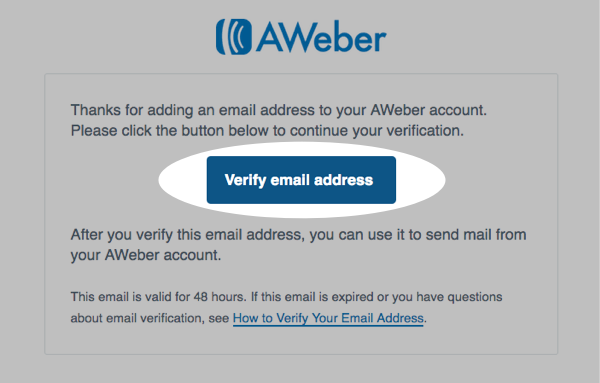
You will receive a message from help@aweber.com with a link to verify. Click the "Verify email address" button in this message.
-
After the email address is entered, return to your list settings and select the newly added email address as the from address for your list.
And that's it! Your from address should be verified. You can check the status of the verification from your account settings. If you need to add a different From address, then you can do so from your "List Settings."
Note: Verification can only be completed by clicking the verify email address button from the email sent to you.
Checking the Status of Your From Address
After you click on the verification link, you can check the status of your domain to make sure your account was successfully updated.
-
Hover over your login email in your control panel and click My Account. Then, click the Domains and Addresses tab from the options on the left-hand side of the page.

-
If you have been sent the verification email, but haven't yet clicked the link, then you will see a yellow "Pending" symbol.

If the From address has been verified, you will see a green "Verified" symbol.

You can resend the verification email by mousing over the email address and clicking the "Resend Verification” icon on the right.

You're all set! After you've added and verified your from address, you can set up DKIM and DMARC authentication for the email address.
Having trouble receiving the verification email?
When verifying a new email address, the verification email is sent to that address' unique inbox. You will need to log into your new domain email address' inbox and find the message in order to authorize it with AWeber.
If you are unsure where to log into your new email address, you will want to reach out to your domain provider - the one you purchased the email address from. Domain providers like Namecheap or Cloudflare, for example will setup a inbox for your domain email with its own login. You can access it and then find the verification message.
If needed, you also can resend the verification email by clicking "Resend Verification" as outlined above.