
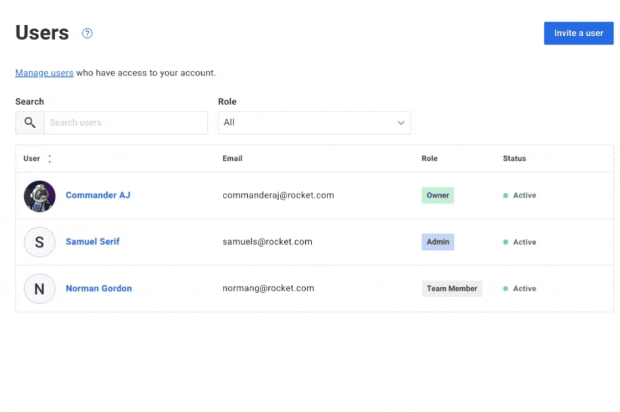
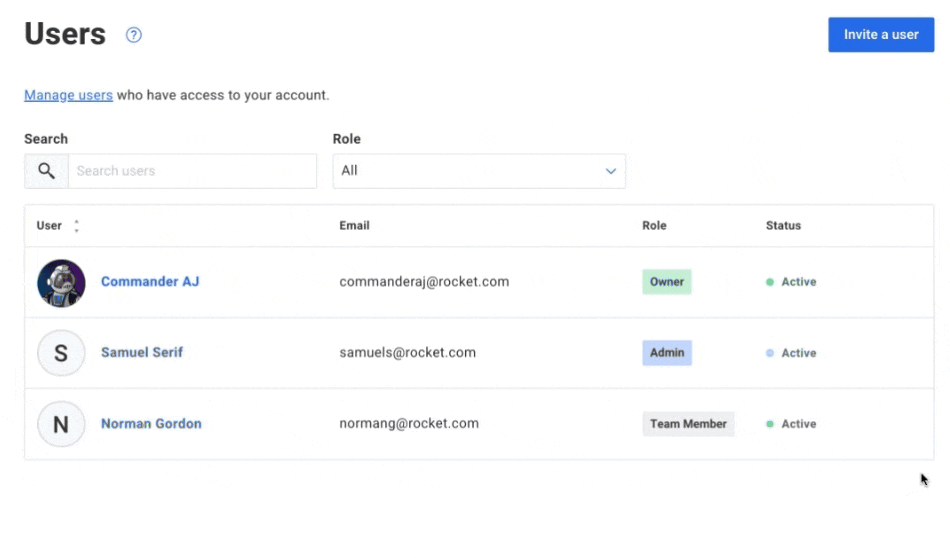
With The Users management page, you can provide access to your AWeber account to other team members. There are three roles that a team member can have with varying levels of account access.
In this article, we will go over how to add a new user to your account, how to change a user's role, and how to remove a user from the account.
Only an Owner or Admin will have access to these settings.
User Seat Limits by Plan
The number of users you can add to your account depends on your plan:
-
Free: No additional users can be added. Only the account owner has access.
-
Lite: Up to 3 total users, including the account owner.
-
Plus, Pro, and Legacy plans: Unlimited users.
If you are on the Free or Lite plan and need to add more users, you can upgrade your plan.
Need to change your AWeber login email address?
To use a new email address for login, you'll need to add the new email address as a new user on your account, and then transfer account ownership to the new user. Once ownership has been transferred, you can remove the old user.
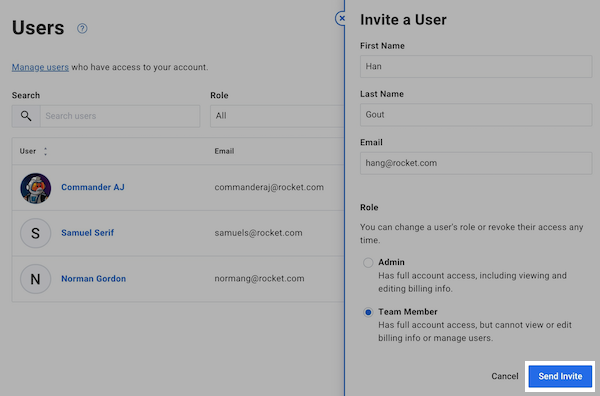
Adding a User
-
Access Users from the bottom-left menu. Then, click "Invite a user".
-
Enter the new user's name and email address, and select their role. After, click "Send Invite" to send an invitation email.
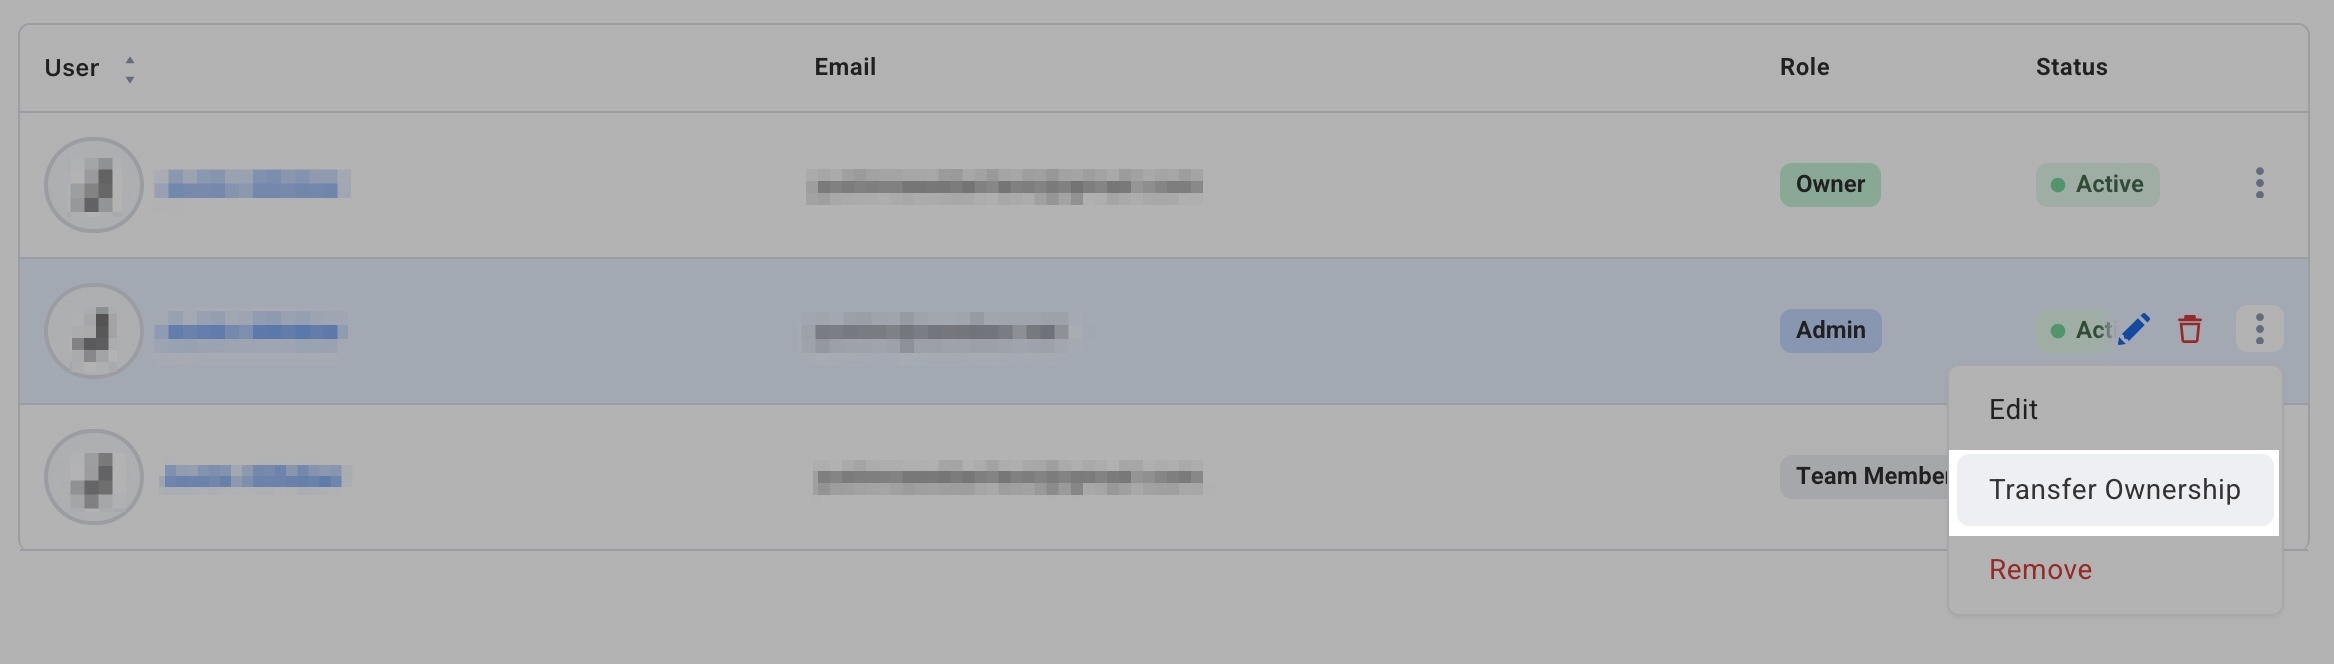
Transferring Account Owner
How to change or transfer your AWeber account ownership to another user:
Adding additional users to transfer account ownership is not available on the AWeber Free plan. Upgrade your account to unlock this feature and many more.
-
Access the Users page.
-
Locate the user you want to transfer ownership to, or add a new user to transfer ownership to.
-
Click the 3 dots menu to the right of the user and select “transfer ownership” in the dropdown.
-
In the pop-up box, press “Transfer Ownership” to confirm the transfer.
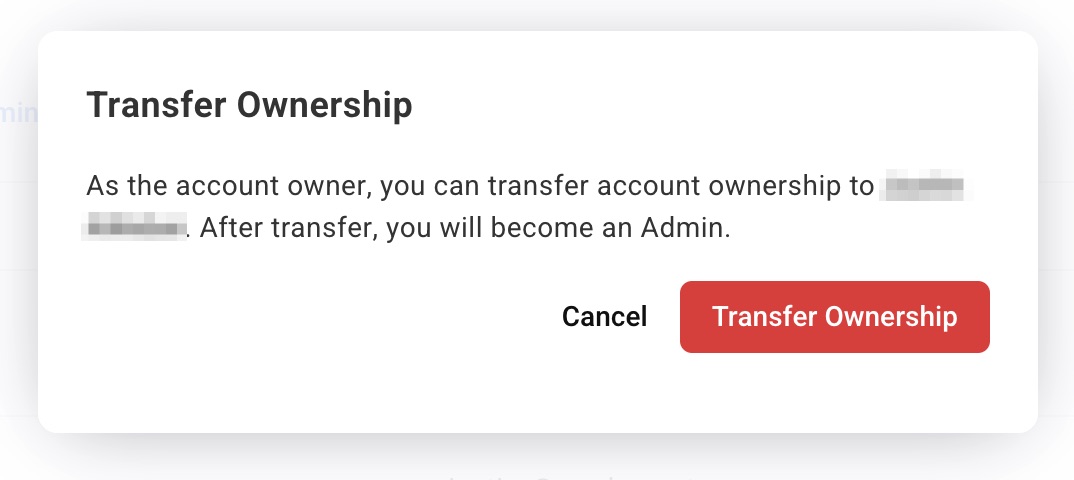
Note: After transferring account ownership, the previous account owner will become an Admin on the account.
Billing and payment information is not automatically updated when ownership is transferred. Coordinate with the new account owner to review and update payment details after the transfer is complete.
Updating the account owner will not update the from address for any lists in the account. Update this information for each list as needed.
Changing a User's Role
-
Access Users from the bottom-left menu. Then, select the user to edit.
-
Select the role to apply to the user, and click "Save".
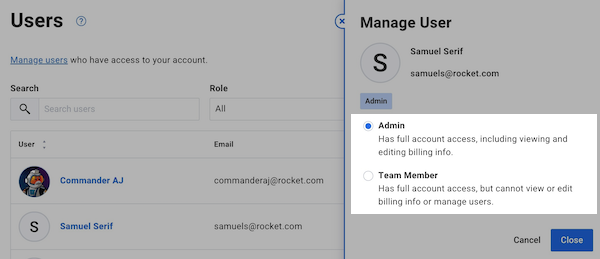
The user's role has been updated successfully and will take effect immediately.
Removing a User
-
Access Users from the bottom-left menu. Then, select "Delete" to remove the user.
-
Then, click "Remove User" to confirm and fully remove the user's access to the account.
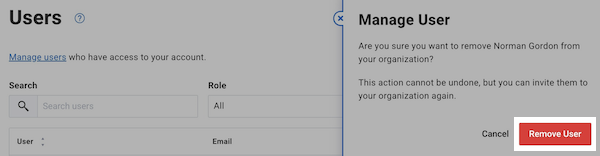
The user has been removed from the account and will no longer have access to it. This will take effect immediately.