
In this article, we are going to walk through the steps to integrate Brave Popups to AWeber.
With the Brave Popup Builder plugin, you can create pop-up forms on for your WordPress site. You can select between different templates (like newsletter and survey forms) or create a form from scratch. You can connect these forms to your AWeber lists so subscribers can sign up and receive more information about your business.
Step By Step Instructions
-
If you haven't done so already, download and install the Brave Popup Builder plugin.
-
Click the Brave Popup icon on the left-hand side of your WordPress control panel, and click "Integrations."

-
Then, select AWeber from the available options.
-
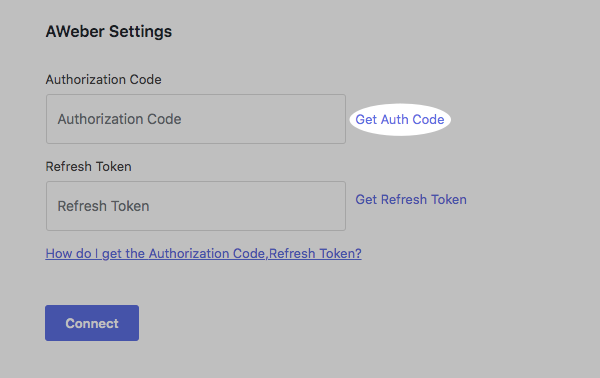
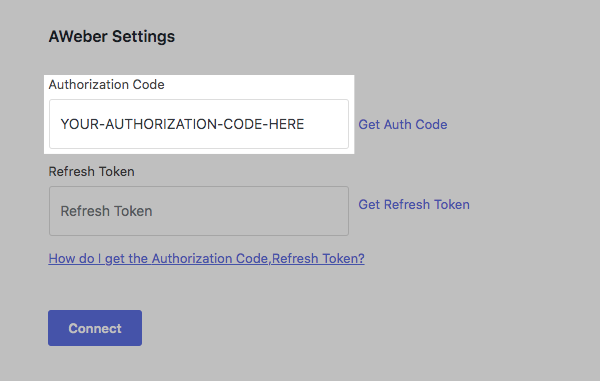
First, you will need to authorize the integration. Click "Get Auth Code" to get started.
-
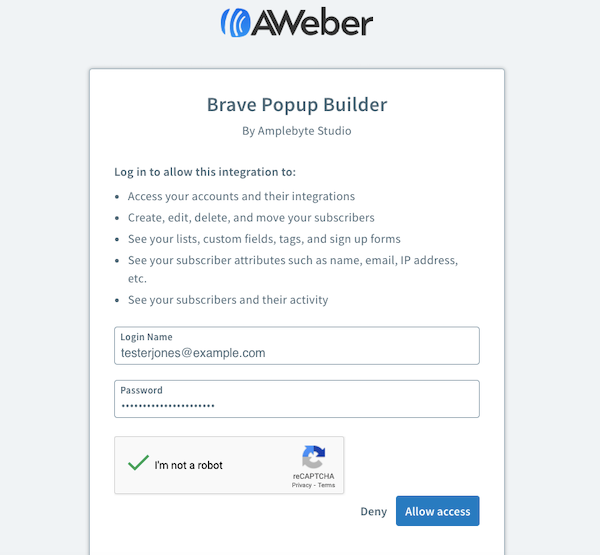
You will have to allow Brave Popup Builder to access your AWeber account information, including your lists, messages, and subscribers. Enter your login credentials and click "Allow Access."
-
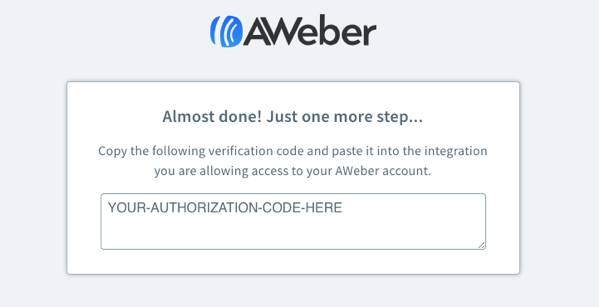
Then, copy your unique authorization code.
-
Return to the integration settings page and paste your authorization code into the textbox.
-
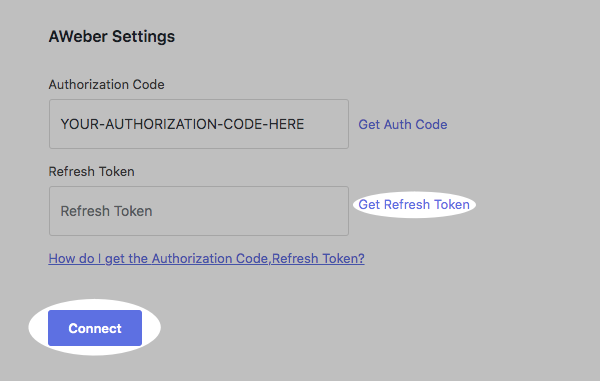
Next, click "Get Refresh Token" to generate a token key. Once complete, click "Connect."
-
Now, you can connect a form to your list. Select "All Campaigns" from the menu options on the left-hand side of the control panel.

-
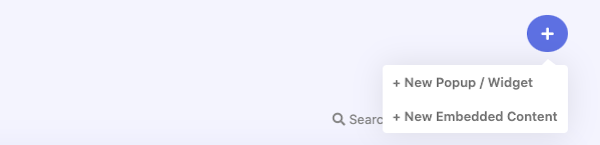
Click the "+" icon and click "New Popup / Widget" to create a new form.
-
Name your popup and select a template.
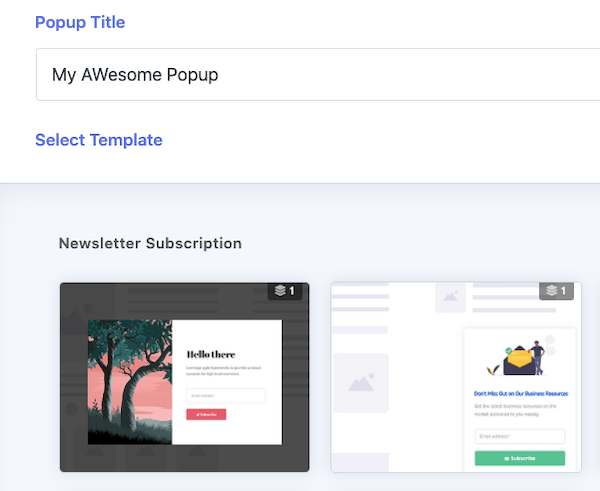
Then, click "Create Popup."

-
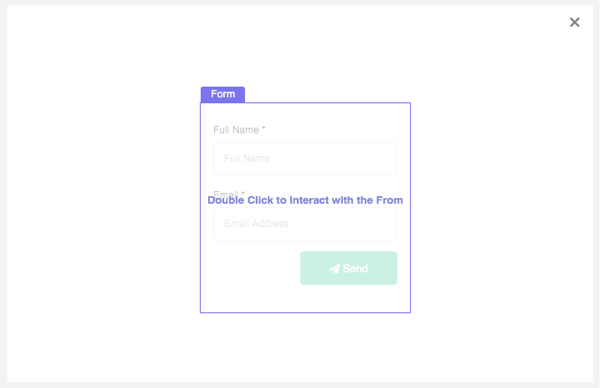
Once you open the form editor, click and drag the "Form" element from the left-hand side of the editor into the body of the form.

-
Double-click the form to pull up more settings.
-
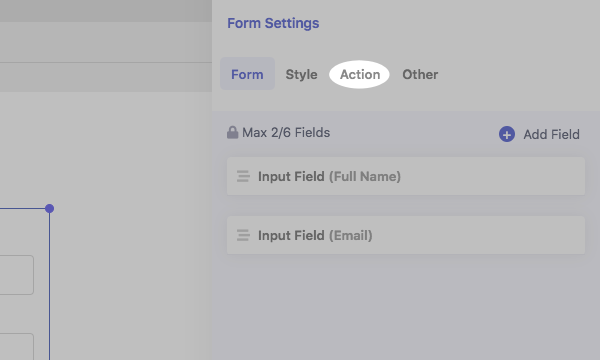
Select the "Action" tab in the "Form Settings" box.
-
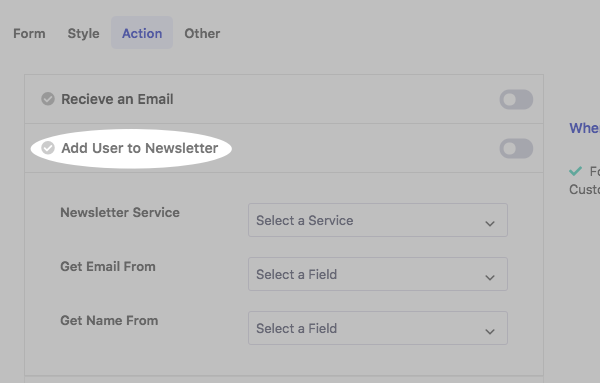
Then, click the "Add User to Newsletter" button.
-
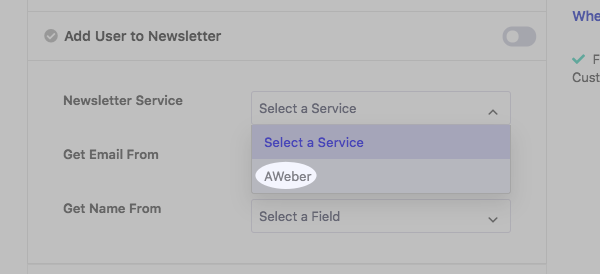
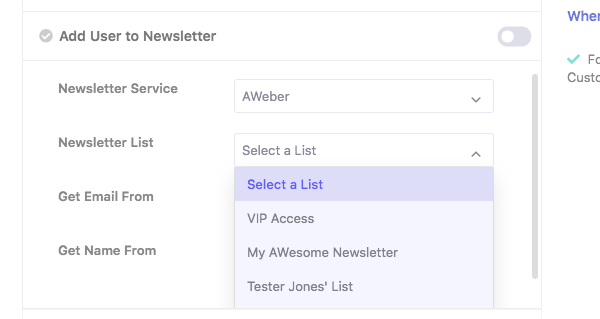
Select AWeber from the "Newsletter Service" drop-down menu.
-
Select the list that you want subscribers added to.
-
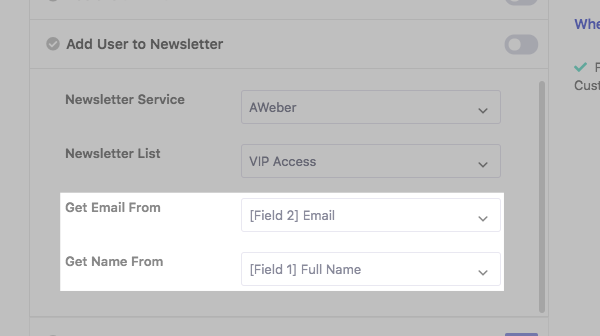
Lastly, map the fields on your form so the correct information is sent over to your list.
-
Once complete, enable the toggle to apply these settings to your form.
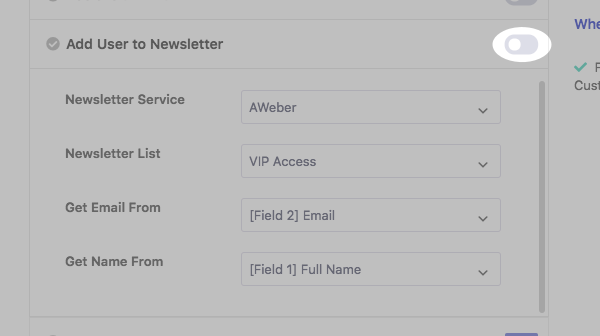
And that's it! Your pop-up form will be connected to your list and visitors to your site will be able to sign up for your newsletter.