
Creating a welcome series using Workflows is a great way to get subscribers started in your list. You can tailor a welcome message based on how they signed up, then provide more evergreen content to move them down the funnel.
Step 1: Create your Workflow
-
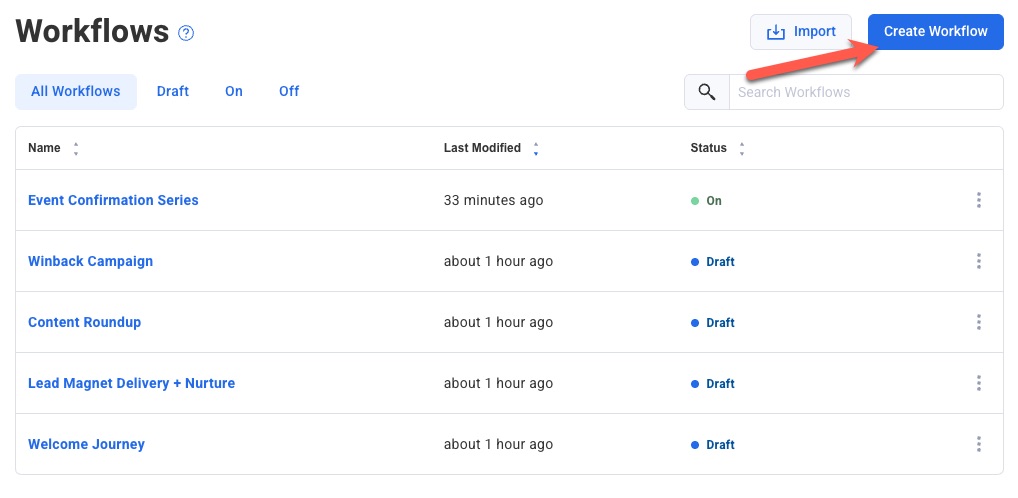
Go to the Workflows tab.
-
Click "Create Workflow."
-
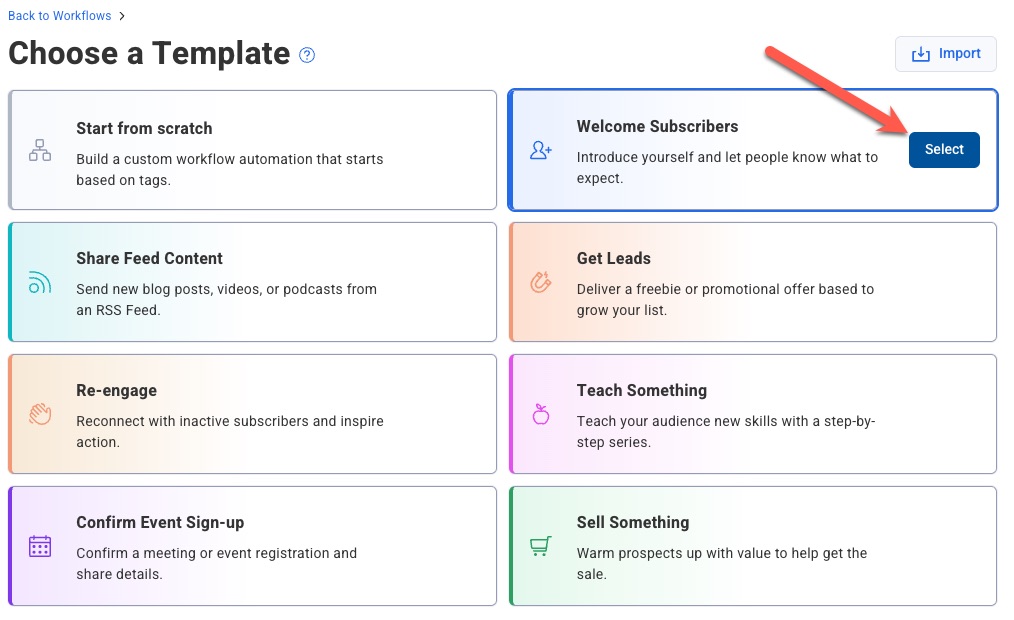
Click "Select" after hovering the "Welcome Series" option.
Step 2: Name your workflow
-
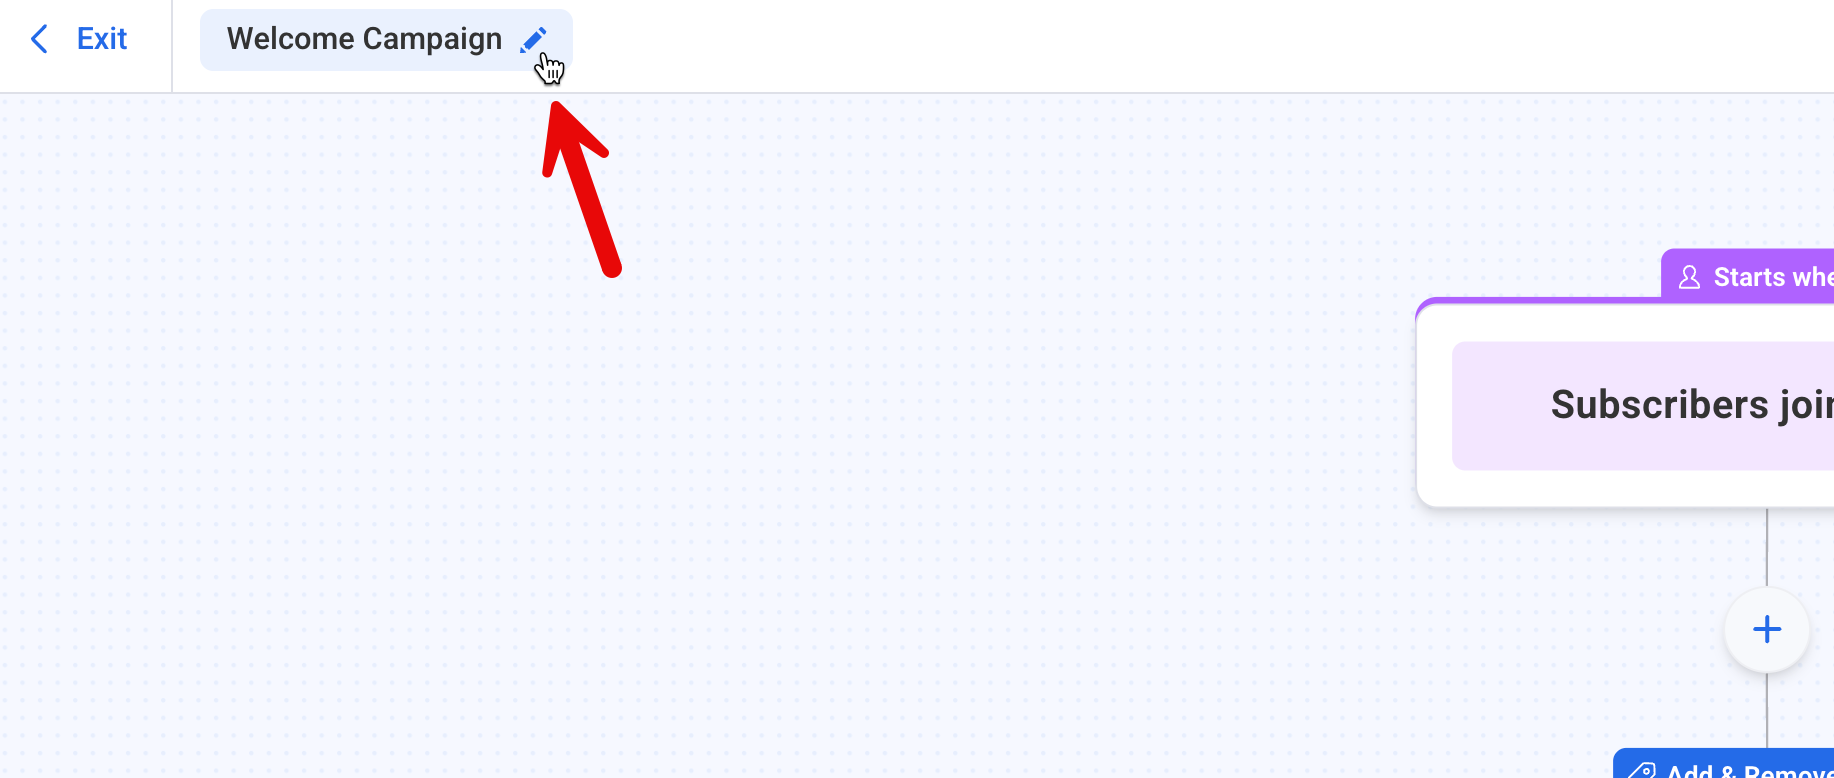
From the upper left hand corner of the editor, click the pencil symbol to change your workflow name.
-
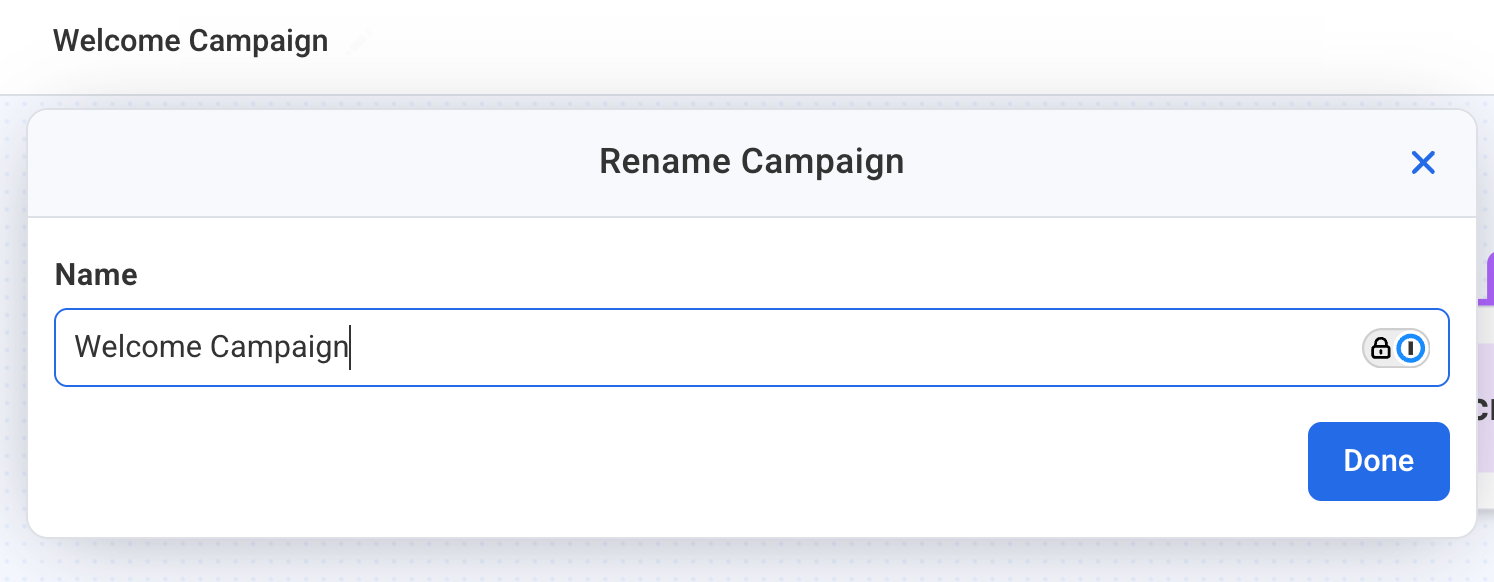
Enter the new name for your Workflow and click “Done” to save your changes.
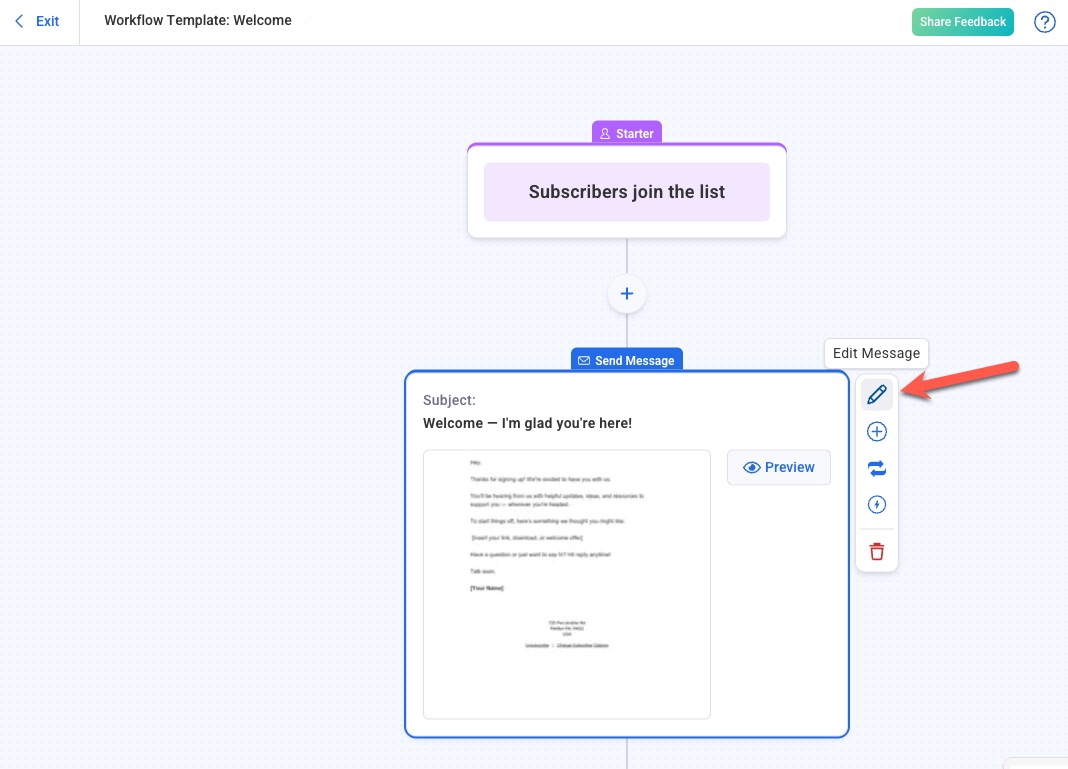
Step 3: Edit your messages
-
Click "Edit Message" to customize your welcome message.
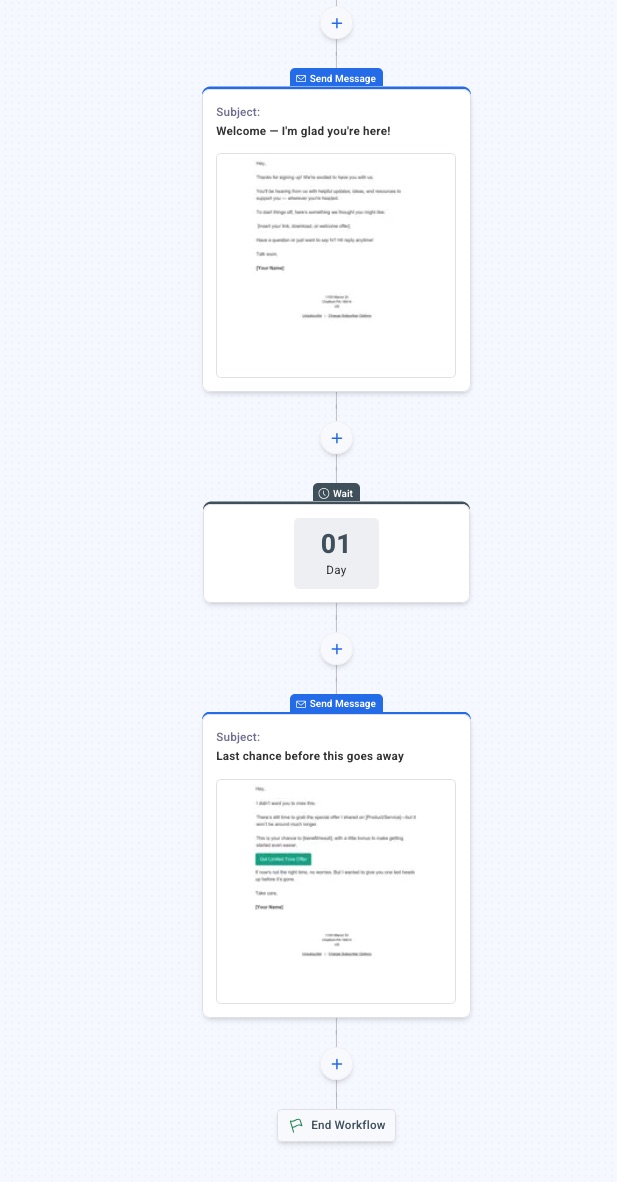
Step 4: Add More Steps (Optional)
If you want more than one message in your welcome automation, you can add more messages with wait times between them.
-
Click the plus icon below your message to add a new step.
-
Select the “Wait” step and specify how long you want the automation to wait in between messages.
-
Click the plus icon again and choose to add a “Message” step.
-
Create a new message, or select an existing message from drafts
-
Repeat this process for any additional messages you want to add to the Workflow.
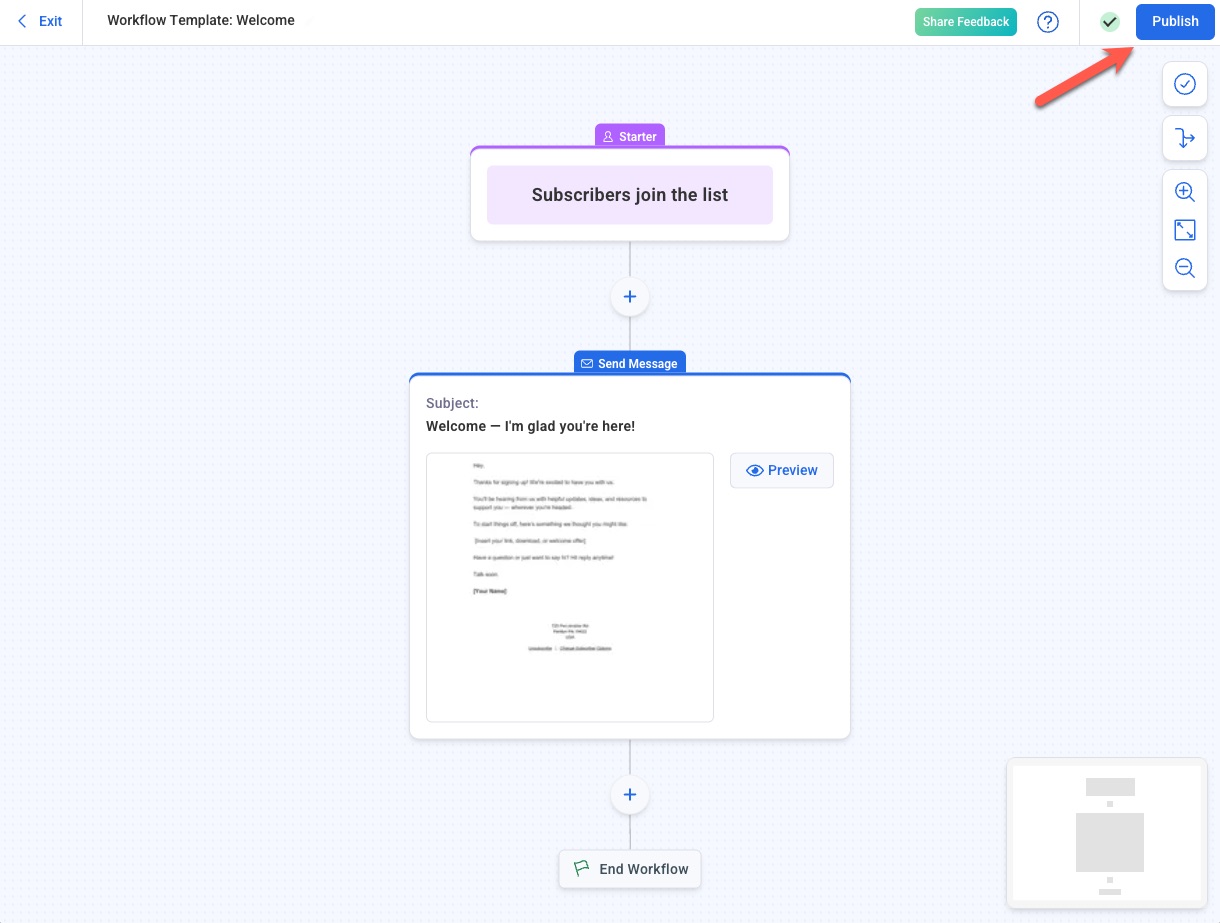
Step 5: Publish your workflow
-
Once you have all of your actions in place, publish your changes by clicking the "Publish" button.
-
Congratulations! You've successfully set up your first welcome series using Workflows.