
If you have an existing list of subscribers, AWeber provides a straightforward process to import them into your account. Whether you're transitioning from another email marketing platform or consolidating contacts, importing ensures continuity in your communication efforts.
For those starting without a subscriber list, AWeber offers tools like customizable Landing Pages and Sign Up Forms to help you build and grow your audience from scratch.
Note: if you're transitioning from another email marketing provider, AWeber offers free expert migration services. The migrations team will handle the transfer of your lists, tags, subscribers, email templates, sign-up forms, campaigns, and landing pages at no extra cost. Request a free migration to get started.
Ensure Your Subscriber List Is Import-Ready
When importing your list from another provider, please be mindful that not every provider organizes list data in the same manner. It is crucial to make sure that:
-
Subscribers have given explicit permission to be added to your mailing list and receive the email content you will be sending.
-
Only current, active subscribers are being moved over. Double check what data you are exporting to make sure you are omitting any addresses that unsubscribed.
-
Subscribers with a history of bounces and delivery failures should not be imported.
-
Subscribers that you have not emailed within the last 6 months should not be imported. Those subscribers will be more likely to bounce your messages or mark them as spam the next time you email them.
For more information: List Compliance
How to Import Subscribers into AWeber
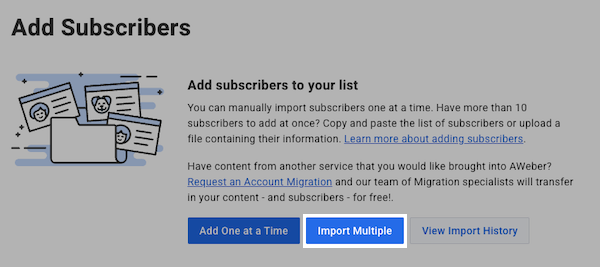
1. Access the Import Tool
In your AWeber account, go to the Subscribers tab and select Add Subscribers. Click on Import Multiple to begin the import process.
2. Choose Import Method
The first step of the import process, the "Import Subscribers" step, will show you the specific list that you're importing to. If you're not working in the correct list, make sure to exit the import tool and navigate to the correct list from the "Active List" drop-down menu.
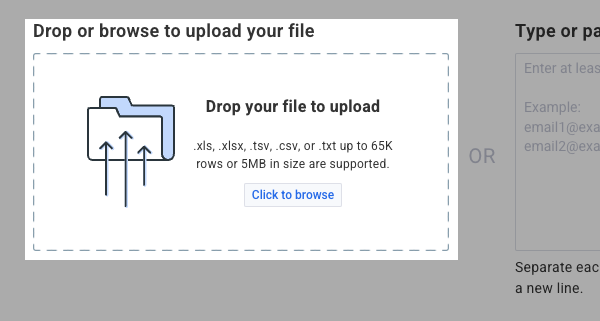
You can either:
-
Upload a File: Supported formats include CSV, XLS, XLSX, TSV, or TXT.
-
Type or Paste Subscribers: Manually enter subscriber details, separating fields with commas, tabs, or semicolons.
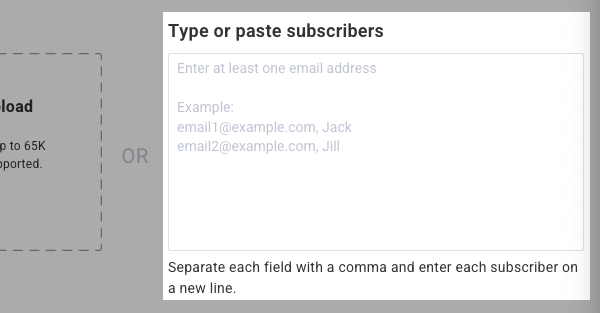
To manually add subscribers, type or paste their details into the input area. Ensure each field (e.g., name, email, custom fields) is separated by a tab, semicolon, or comma. For example:
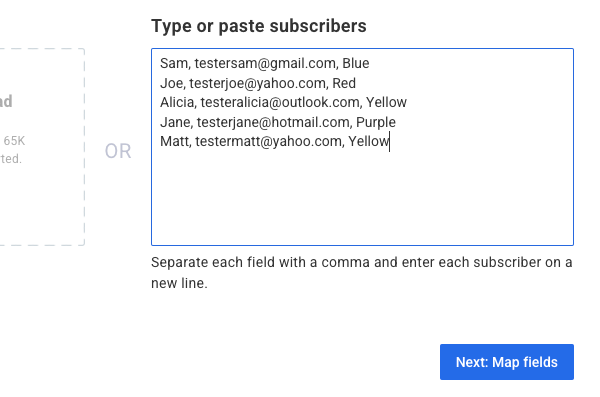
After entering the information, click Next: Map Fields to proceed.
3. Map Subscriber Information
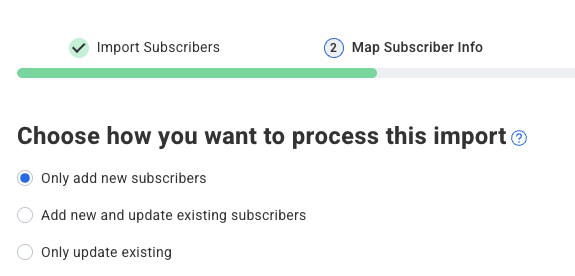
Specify if you'd only like to have new subscribers added into your list from the file that you are importing, or if you'd like to update existing subscribers with the information contained within your file.
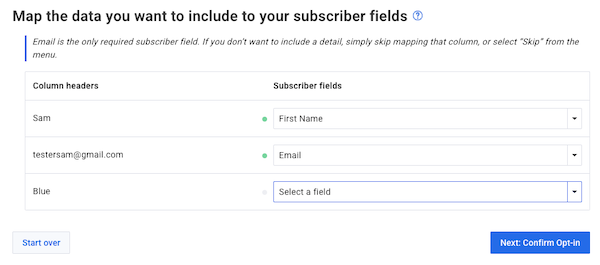
Align each column from your file to the appropriate AWeber fields (e.g., Name, Email). The top of each column should reflect the name for your fields. If your column contains subscribers' names, the top line for the column should be “Name”, and if your column contains subscribers' email addresses, the top line for the column should be “Email”. Follow this structure for all of the fields you will be mapping.
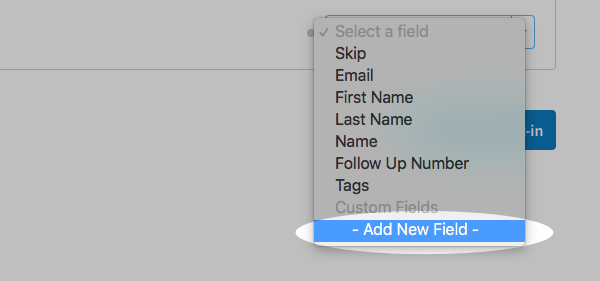
If needed, create new custom fields by selecting Add New Field.
Then name the field and click “Add”.
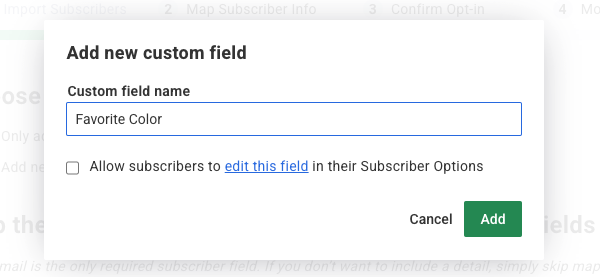
Note: Due to how information is stored in the database, you can only add one field with the word "Name" in it.
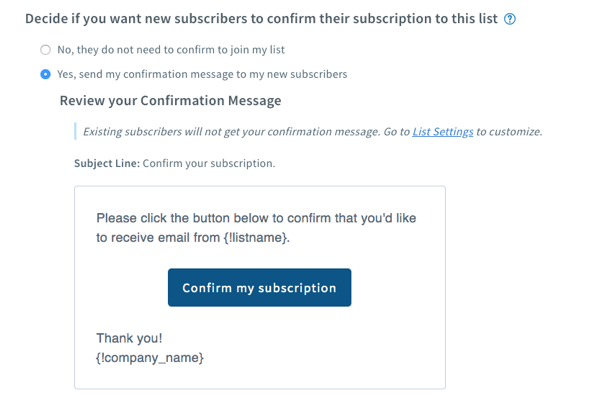
4. Set Confirmation Preferences
Decide whether to send a confirmation email to imported subscribers. If you would like to send a confirmation again, select 'Yes.' If you do not wish to send a confirmation message again, click 'No.' The 'Yes' option will be selected by default if you have confirmation enabled in your list settings.
You will see a preview of the confirmation message. If you would like to make any changes to this message, you will have to do so through your list settings. Once complete, click "Next: More Options."
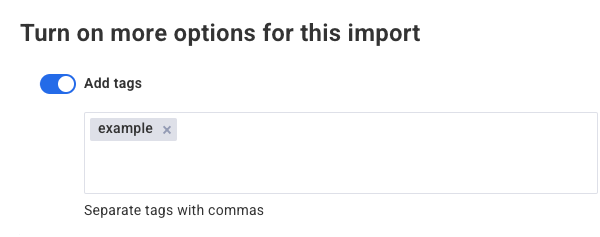
5. Apply Tags and Automations
Optionally, add tags to your subscribers to segment them or trigger specific campaigns. You can also enable automation rules for any list automations you have set up.
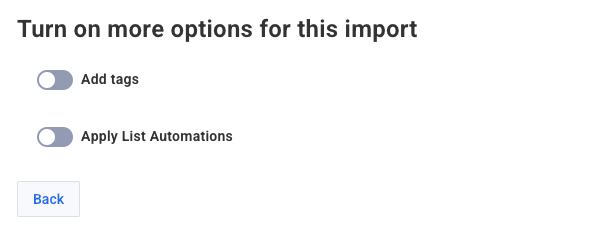
Then, add any tags that you would like to apply in the textbox. Once complete, click the "Next: Background Info" button.
6. Provide Background Information
Specify how and where you obtained these subscribers (e.g., website signup, event). Select one of the available options and provide more details as required.
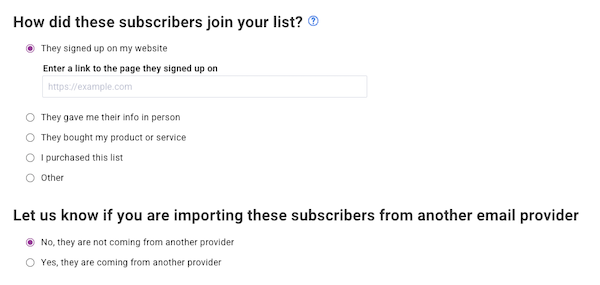
Note: the more detail you can provide in your explanation, the better. If you are moving an established list from another service and you used multiple methods to build your list, please use the "Other" option and provide as much information as possible in the textbox that we provide. It is worthwhile to include information about how long you have collected these subscribers, how often you have sent to them, any events where these subscribers joined your list, any advertisements used to drive your subscriber acquisition, and details about verbal agreements to subscribe to your list.
7. Submit Your Import
Once complete, click the "Submit your import" button towards the bottom-right corner of the page.
Import Review
All imports are subject to a combination of automatic review by our system and manual review by our Import Team for quality assurance. If an import is sent to manual review, this review should take no longer than one business day to complete. You can check the status of this review and past imports by visiting the Import History page for your list. We will also email you once this review has been completed.