
Clickfunnels is a service that allows you to create landing pages that help build your mailing list. The AWeber integration with Clickfunnels allows you to have subscribers that are captured through Clickfunnels added directly to your AWeber list. You can also add tags to your Clickfunnels form, allowing you to further automate your campaigns and target subscribers based on the specific information they requested.
You can also choose to integrate with Clickfunnels using the HTML Form method. Utilizing the HTML Form method, you will be able to collect additional information from your subscribers—like their phone number.
AWeber Integration
-
Within your Clickfunnels account, bring up your Account Details by clicking on the profile icon in the top right corner and select "Account Settings".

-
Click the "Integrations" button in the left-hand sidebar menu.

-
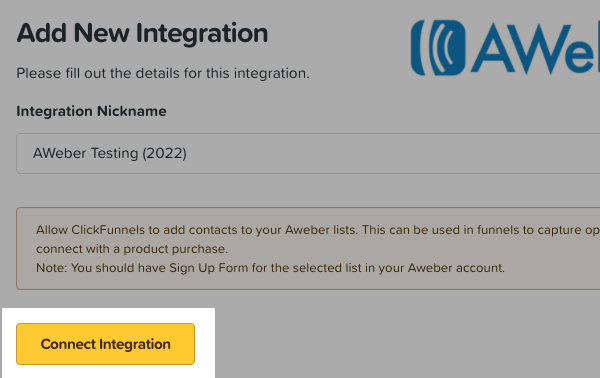
On the next page, select "Add New Integration". You'll then be able to search for and select AWeber.

-
After selecting AWeber as the integration you'd like to connect, click "Connect Integration."
-
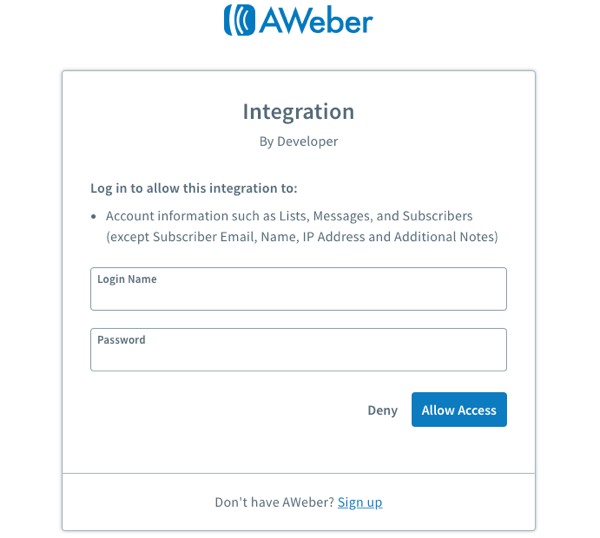
You will then be taken to a page where you will want to enter your AWeber login name and password. Once those details are entered, click the "Allow Access" button.
-
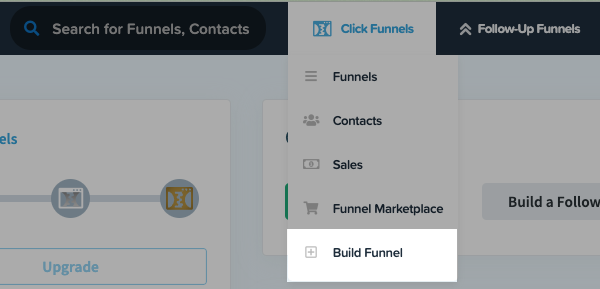
Now that AWeber is connected to Clickfunnels, go back to the homepage of your Clickfunnels account. You can access your homepage by clicking the Clickfunnels logo in the upper left hand corner at the top of the page. If you haven't done so already, create your funnel by clicking the "Build Funnel" button.
-
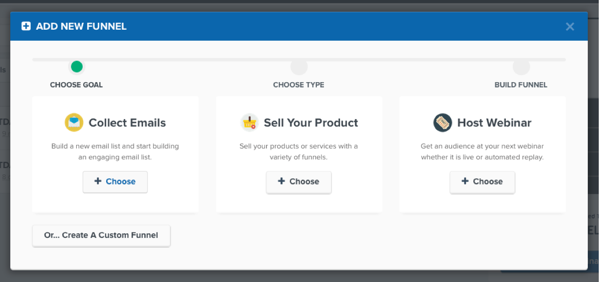
Choose the different funnel type you would like to create by clicking the "Choose" button. For our example, we will be selecting "Collect Emails" as our funnel. Enter you "Funnel Name"
-
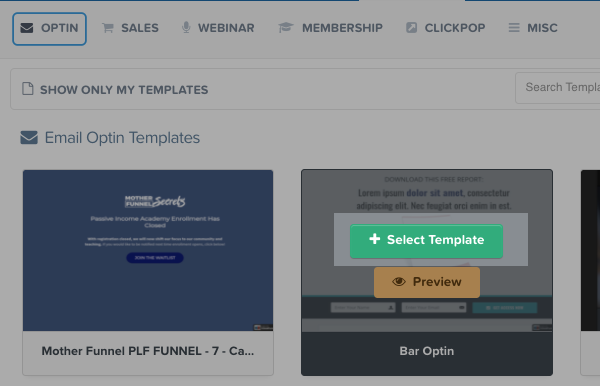
Hover over the template you would like to use. Then, click the "Select Template" button.
-
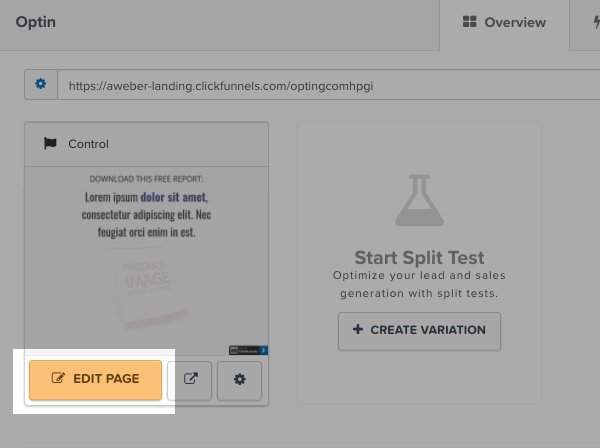
Click the "Edit Page" button for your page.
-
From the upper left-hand side of the page, select "Integrations" from the Settings menu.
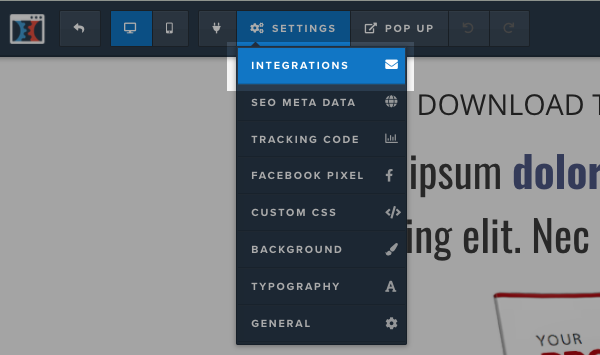
If you're using Clickfunnels Classic editor, you will find integrations under the "Email" section from the right menu. If you are not using the Classic editor, proceed to the next step.
-
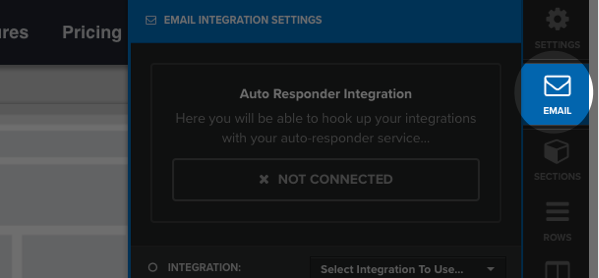
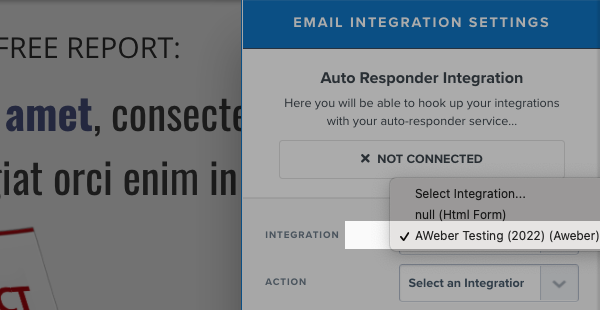
Then, select the integration that you would like to use from the "Integration" drop-down menu. Your connected integrations will be listed based on the nicknames you used.
-
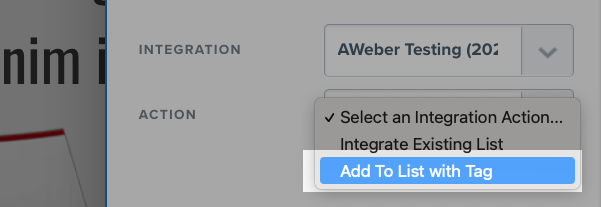
To add tags to your form, select "Add To List with Tag" from the "Action" drop-down menu.
-
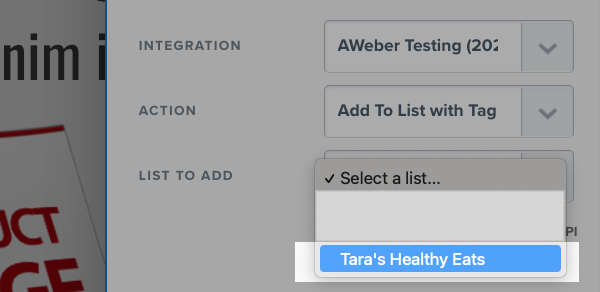
Next, choose the list you would like subscribers added to from the "List to Add" menu.
-
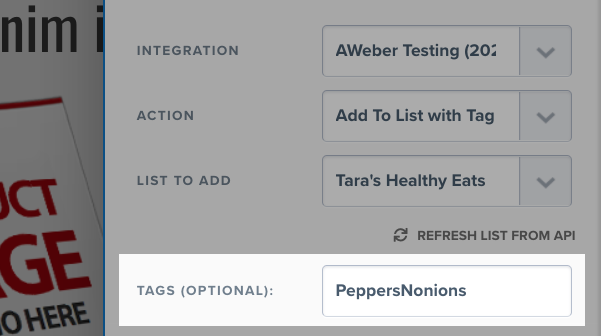
Add any tags that you would like to the "Tags" box. Hit "enter" on your keyboard to add multiple tags.
-
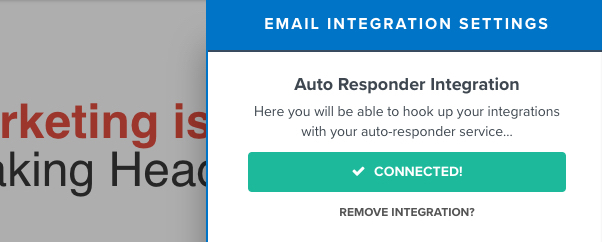
Once you have completed these steps, the Email Integration Settings will say "Connected!"
That's it! Now when visitors go to your Clickfunnels page and sign themselves up, they will be added to your AWeber mailing list.
Please note: Subscribers can now be added to your AWeber list after they make a purchase via ClickFunnels!
HTML Form Method
-
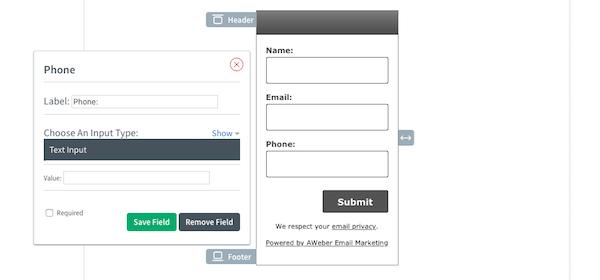
After you create your Clickfunnels landing page, you will need to create an AWeber Sign Up Form with identical fields.
Since you will be using the unformatted basic HTML form, it does not need to be stylized. Make sure custom fields are set to "Text Input" type.
Please note: The redirect URL will need to be manually set within your Sign Up Form. You can accomplish this by changing the thank you page in Step #2.
-
Once the Sign Up Form has been created, navigate to Step #3. Click "Publish" to retrieve the HTML code.
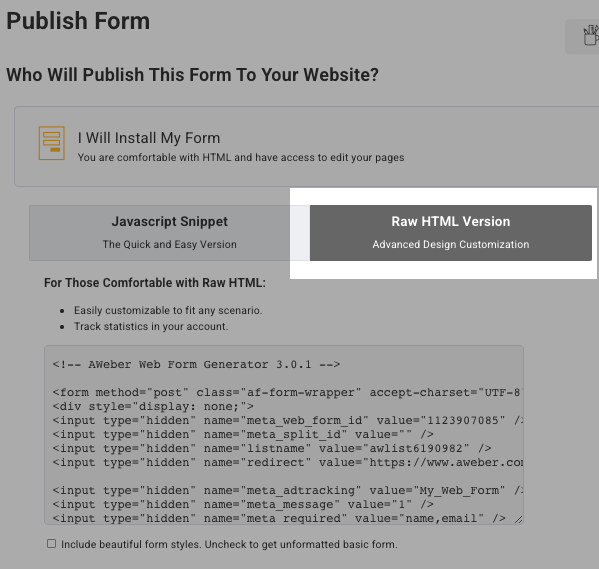
In order to properly integrate your Sign Up Form with Clickfunnels, make sure that "Include beautiful form styles." is unchecked. You will need to copy the code starting with <form method… and ending with </form>.

-
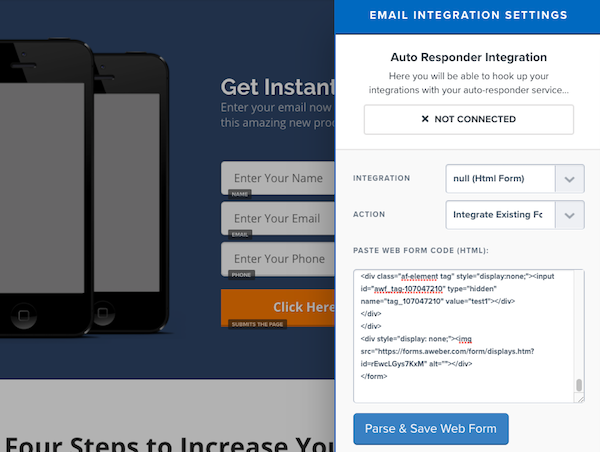
In Clickfunnels, select "null (HTML Form)" as your integration. Then, paste the HTML code into the "Paste Web Form Code (HTML)" box. Once complete, click "Parse & Save Web Form."
-
Next, match up the Clickfunnels fields with the respective AWeber inputs. Once your fields have been mapped, save your landing page and you are set!
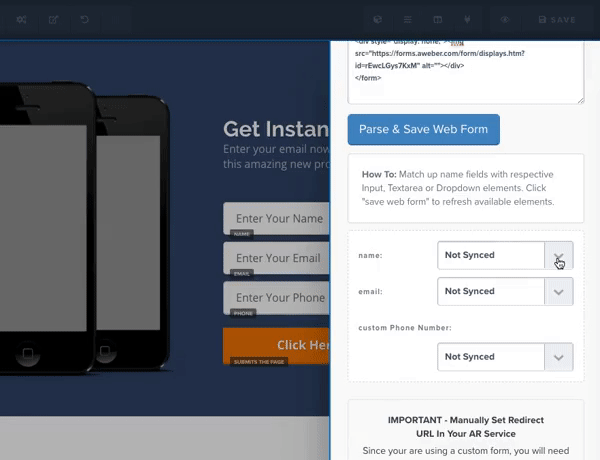
Please note: After mapping your fields, you do not need to click "Parse & Save Web Form" again. Doing so will refresh and reset your fields.
Troubleshooting Your Form
If you follow either of the methods above and notice that subscribers are not being added to your list, you might need to set up the action for your submit button. This will be done through the button itself, not the form "Integration" settings.
-
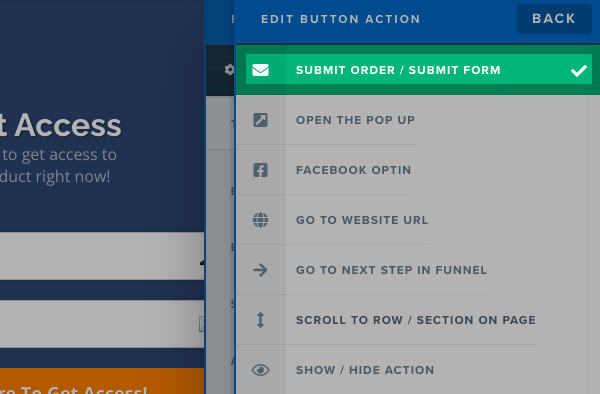
First, click on your submit button to open the settings. Then, click the "Set Action" button from the menu on right-hand side of the editor.
-
Select the "Submit Order / Submit Form" option.
Connecting Clickfunnels 2.0
Looking to connect a Clickfunnels 2.0 account with AWeber? The integration steps are similar as outlined above with some few differences. Clickfunnels resource for connecting Clickfunnels 2.0 with AWeber offers step by step instructions for connecting the two services.
And that's it! Your form should be successfully connected to your list and set to submit. When someone subscribes, they will be added to your list with any tags you applied.