
Using our Calendly integration you'll have the ability to:
-
Add/update subscribers who receive an invite to any of your lists.
-
Unsubscribe subscribers when an invite is canceled
-
Update subscribers with a tag if they're a no-show or reschedule
You can easily integrate Calendly with AWeber through our Calendly app located on the Integrations page.
Note: This integration requires a paid Calendly account.
Step By Step Instructions
-
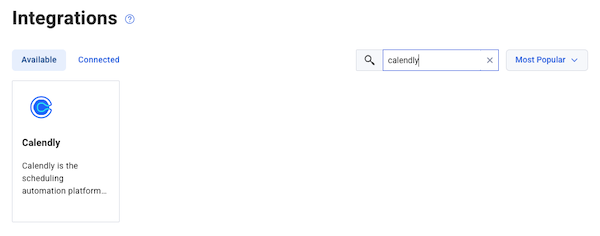
In your AWeber account, click the Integrations tab from the navigation bar on the left side of the page.
-
Locate or search for the Calendly app under the "Available" tab and click on it.
-
Click the blue "Connect Integration" button in the upper right corner.

-
After logging into Calendly, you'll then need to authorize the connection from Calendly to AWeber.
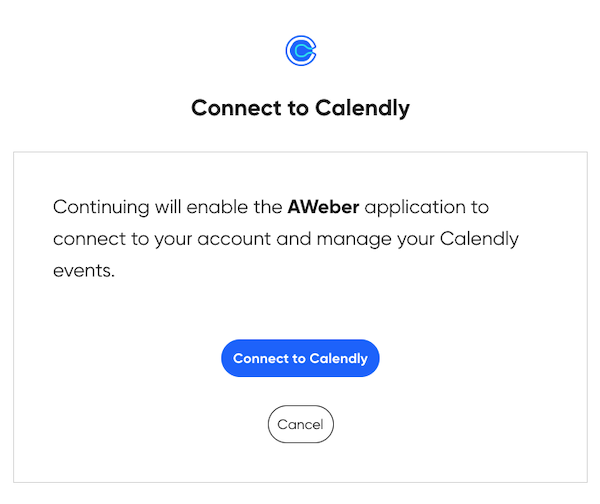
💡 Important: When you authorize the connection, AWeber will connect to your Calendly account's main scheduling page (e.g., calendly.com/your-name). If you need to connect a different Calendly account later, you'll need to disconnect and reconnect the integration.
-
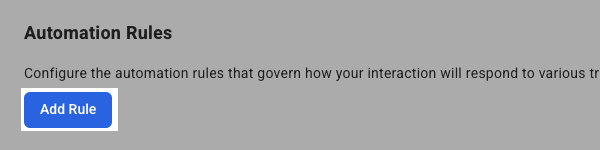
Head back to your AWeber account. Once here, you can add your first rule by clicking the blue "Add Rule" button.
-
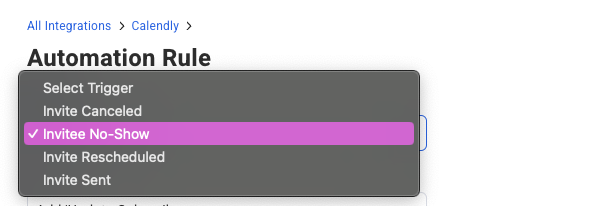
Start by adding a trigger condition.
-
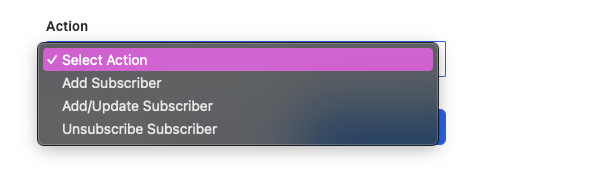
Next, select your action of Add Subscriber, Add/Update Subscriber, or Unsubscribe Subscriber.
-
Select the list you wish to apply rule to.

-
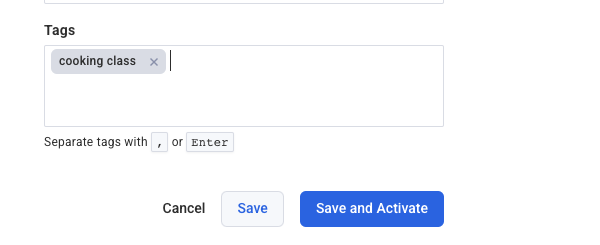
If you're adding or updating the subscriber, you'll also have the option to apply one or more tags to a subscriber.
-
Finally, you can save your rule and if ready activate it as well. If you click the "Save" button it will save the rule and leave it inactive so that if that specific trigger takes place, no action takes place within AWeber. If you "Save and Activate" it'll immediately activate the rule so that when the trigger condition is met, the corresponding action will take place.
At any time, you can add additional rules, edit existing rules, activate or deactivate a rule, and delete a rule. You can also view your connected Calendly scheduling page under "Connection Settings" in the integration details.
Frequently Asked Questions
How do I change which Calendly account is connected to AWeber?
The integration connects to your Calendly account's main scheduling page (e.g., https://calendly.com/your-name) when you first authorize the connection. If you need to connect a different Calendly account:
-
Navigate to the Integrations page
-
Find the Calendly integration and click on it
-
You can find your currently connected Calendly scheduling page under "Connection Settings"
-
Click the "Disconnect" button to remove the current connection
-
Click "Connect Integration" to start a new connection
-
Log into the Calendly account you want to connect
-
Authorize the connection between Calendly and AWeber
-
Reconfigure your rules as needed (previous rules will have been removed during disconnection)
💡 Important: When you disconnect the integration, all existing rules will be removed. Make note of your current rules before disconnecting so you can easily recreate them.