
Follow these steps to schedule a broadcast message in your AWeber account, allowing you to send emails at a specific date and time without needing to log in again.
Note: AWeber verifies your domain's sender-authentication status each time a broadcast is sent. If your domain is no longer authenticated at send time, your broadcast will be returned to Draft status and you will receive a notification to re-authenticate before sending. Keeping your active ensures uninterrupted delivery.
Key Terms
Broadcast: A one-time email sent to your subscribers.
Draft: An unsent email message saved for editing or scheduling.
Segments: Filtered groups of subscribers based on set criteria.
List: A group of subscribers under a specific campaign or audience.
Social Sharing: Option to post your email to connected social media accounts.
Newsletter Hub: A web-based archive where all your past broadcast emails can be viewed online.
1. Access the Schedule Menu
-
Navigate to the Messages tab.
-
Locate the message you wish to send and click Schedule.

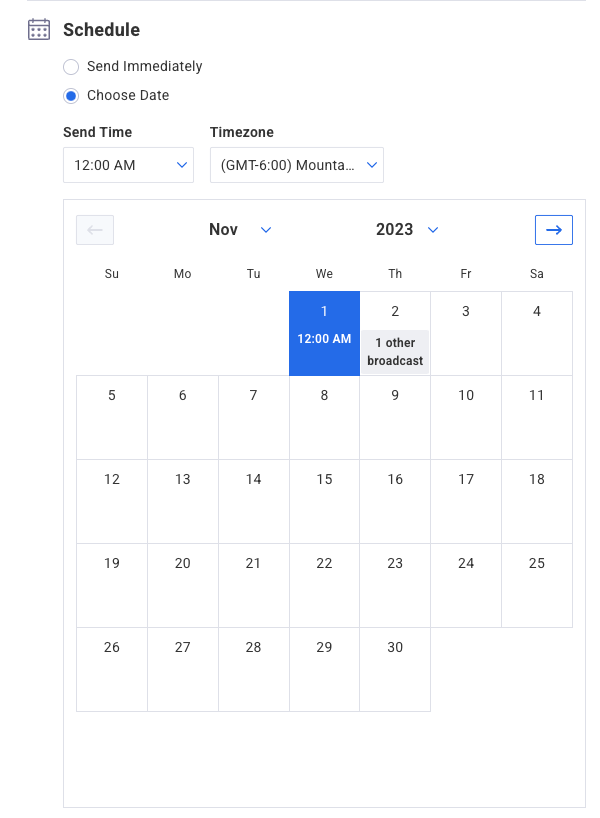
2. Set the Send Date and Time
-
Click the “Edit” button next to “Schedule”.
-
In the Schedule section, click “Choose Date”.
-
Use the calendar to select your desired send date.
-
Above the calendar, set the specific time and time zone for sending the broadcast.
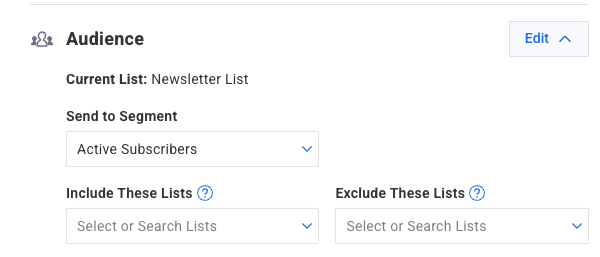
3. Define Your Audience
-
Under the Audience section, click the “Edit” button.
-
Choose the segment of subscribers you want to receive the message. Be default, the “Active Subscribers” segment is selected, which includes all subscribers currently subscribed to your list.
-
You can also include or exclude other lists as needed.
Note: Excluding lists allows you to prevent subscribers from specific lists from receiving a broadcast email, even if they’re on an included list. This is particularly useful when subscribers are on multiple lists, and you want to ensure they don't receive irrelevant messages. By selecting lists to exclude during the broadcast setup, any subscriber on those lists will be omitted from the mailing, even if they are also on the included lists.
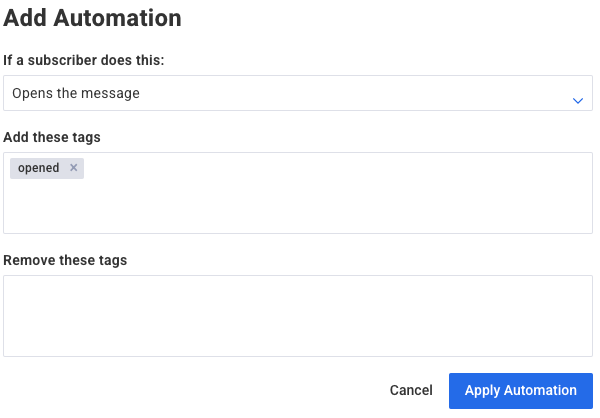
4. Add Automations (Optional)
Broadcast automations enable you to trigger actions based on subscriber interactions with your emails. For instance, when a subscriber opens a broadcast or clicks a specific link, you can automatically apply tags to them. These tags can then initiate workflows, such as sending follow-up messages tailored to their interests. This feature helps in delivering more personalized and timely content to your audience.
-
In the Automations section, click the “Add Automation” button.
-
Select a trigger: when a subscriber opens the message or clicks a link.
-
Assign tags to be added or removed based on the trigger.
-
After entering each tag, press Enter or Return to confirm.
-
Click Apply Automation to save your settings.
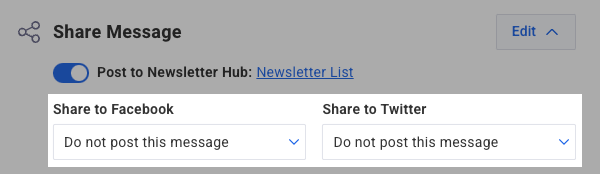
5. Configure Social Sharing (Optional)
-
Under the Share Message section, click the “Edit” button.
-
Newsletter Hub can be toggled on or off for this broadcast.

-
If the Newsletter Hub is enabled, you can choose to share the message on connected social media platforms like X or Facebook using the provided dropdown menus.
6. Finalize and Schedule Your Broadcast
-
If you wish to send the message immediately, click Send Message Now.

-
If you've set a future send date and time, click Schedule Message. The scheduled send time will be displayed next to the button.
