
Split testing (also known as A/B testing) allows you to compare different versions of your emails, such as subject lines or content, to determine which performs better with your audience. A split test involves sending different versions of an email to separate groups within your subscriber list. After analyzing performance metrics like open rates and click-through rates, you can identify the most effective version and send it to the remaining subscribers.
By sending variations to segments of your list, you can optimize engagement and improve your email marketing results.
Note: This feature is not accessible on the AWeber Free plan. Upgrade your account to unlock this feature and many more.
Further instructions: How do I upgrade my AWeber account from Free to Plus?
Key Terms
-
Split Test: A method of comparing two or more email variations to determine which performs better.
-
Broadcast: A one-time email sent to your subscribers, either immediately or scheduled for a specific time.
-
Segment: A subgroup of your subscribers defined by specific criteria, allowing targeted messaging.
-
Open Rate: The percentage of recipients who open your email.
-
Click-Through Rate (CTR): The percentage of recipients who click on links within your email.
How to Create a Split Test
-
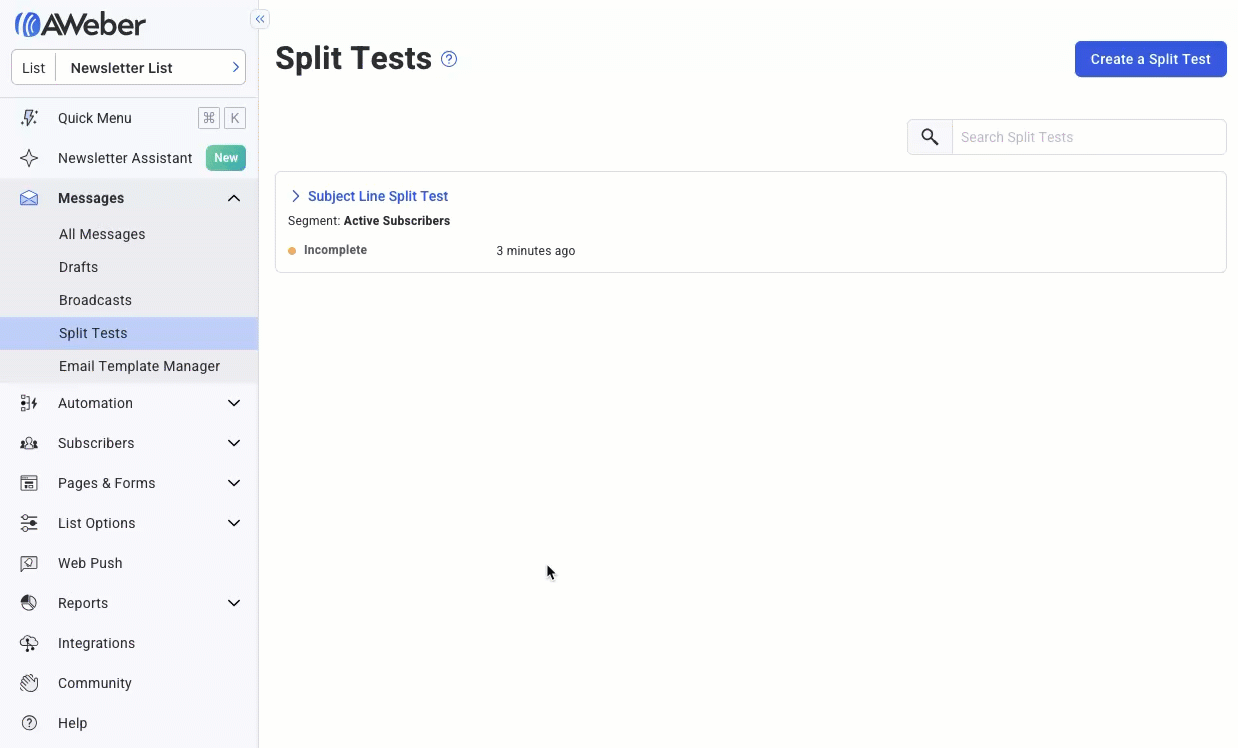
Navigate to the Messages tab and select Split Tests.
-
Click the “Create a Split Test” button.
-
Enter a name for your split test to help you identify it later.
-
(Optional) Select a specific segment of your list to target.
-
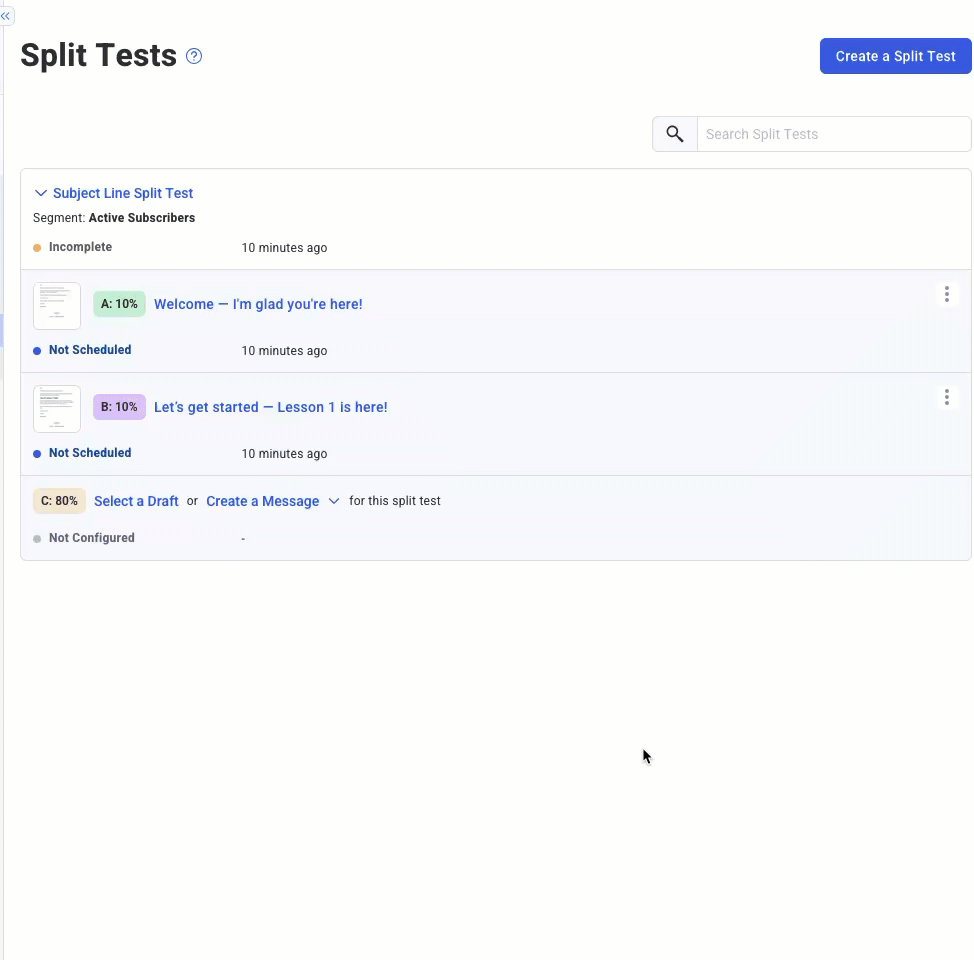
Adjust the slider to define your split groups:
-
2 Groups: Test two variations.
-
3 Groups: Test two variations and reserve the third group to receive the winning version.
-
-
Click Create Split Test to proceed.
Note: in the example above, a 10/10/80 split is selected, which would allow for A/B testing to 20% of the list, and sending the winner to the remaining 80% of the list.
Assigning Messages to Each Group
For each group (A, B, and optionally C):
-
Click on the split test name to open its details.
-
Click Select a Draft and choose the email version you want to assign to that group.
-
After selecting the draft, click Schedule to set the send time.
-
Repeat these steps for each group.
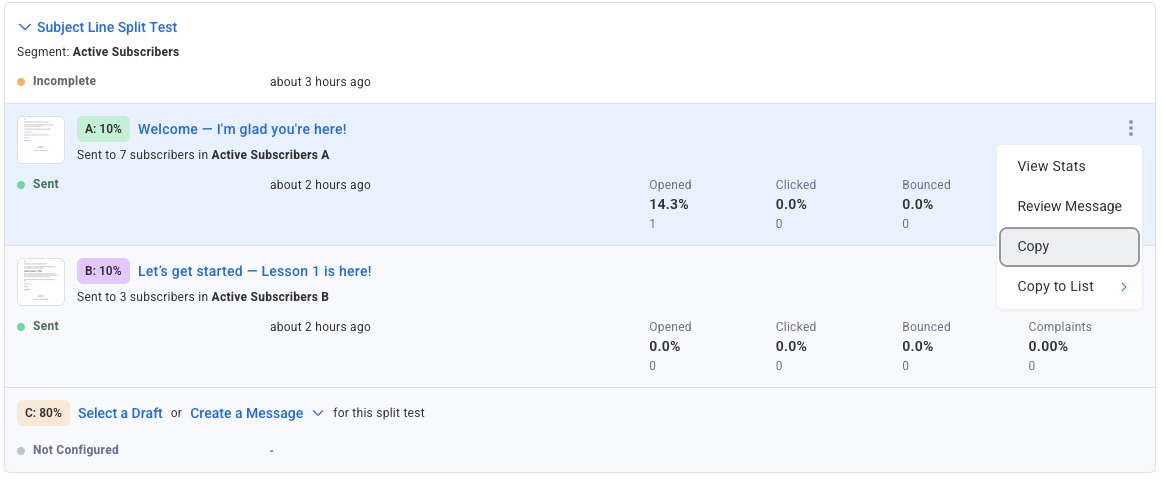
In the example above, the A and B messages are added so that they can be tested. The winner can then be sent to the remaining 80% of subscribers in group C after evaluating the results.
To schedule each message, click the 3 dots menu next to the message, and then click “schedule”. You can then schedule the split test just as you would schedule a broadcast.
Determining the Winning Version
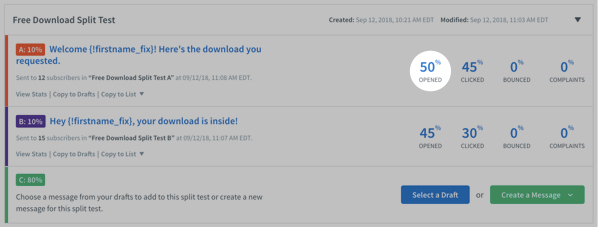
After sending the test emails to groups A and B:
-
Return to the Split Tests page.
-
Click the arrow next to your split test to view performance statistics.
-
Compare metrics such as open rates and click-through rates to identify the better-performing email.

Based on engagement (subscribers who opened the message), Split Test A would be determined as the winner.
Sending the Winning Email to Group C
Once you’ve determined the winning message:
-
Click on the 3 dots menu to the right of the message and select “Copy” in the dropdown to copy it to drafts.
-
Click “Select a draft” for group C and select your draft message.
-
Click on the 3 dots menu next to message C and schedule it.
Tips for Effective Split Testing
-
Test one variable at a time: Focus on a single element (e.g., subject line, call-to-action) to clearly identify what influences performance.
-
Ensure sufficient sample size: Send your test emails to a large enough segment to gather meaningful data.
-
Monitor results promptly: Review performance metrics soon after sending to make timely decisions. Generally, it’s advised to wait at least 24-48 hours to give subscribers adequate time to interact with the message.