
Wistia is a video hosting solution for businesses and personal users. With Wistia you can customize videos so that you have control over how the video looks, feels, and functions. Beyond that, Wistia provides you with analytics that can help you determine what does and does not work with your videos.
The Wistia integration allows you to have a sign up form appear directly on your video. This form can appear at any point in time that the video is playing. So not only can you deliver a great video, you can also collect potential subscribers.
This article explains how you can integrate Wistia with AWeber.
Step By Step Instructions
-
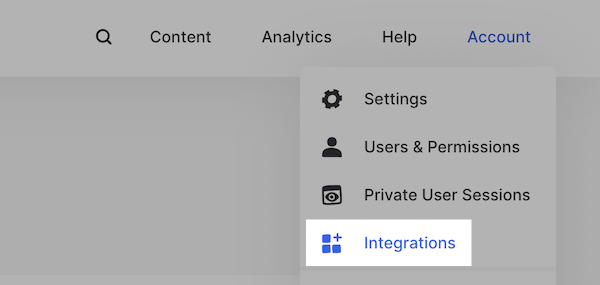
First, log into your Wistia account. Once you are logged in, hover over the "Account" tab at the top of the page and from the drop down menu that appears, then click "Integrations".
-
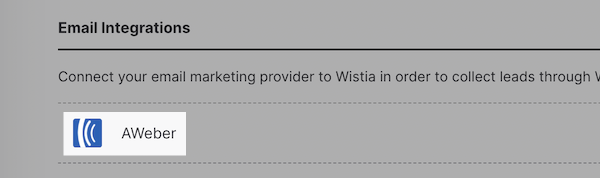
Then, click AWeber from the list of available Email Integrations.
-
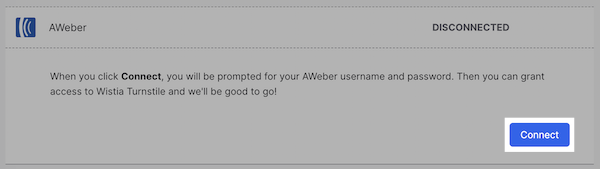
After clicking "AWeber," additional information for connecting the integration will drop down on the page. Click the "Connect" button.
-
On the next page, enter your AWeber login information and then click the "Allow Access" button.

-
Now, if you haven't already, upload a video to your Wistia account that you would like to insert a sign up form onto.
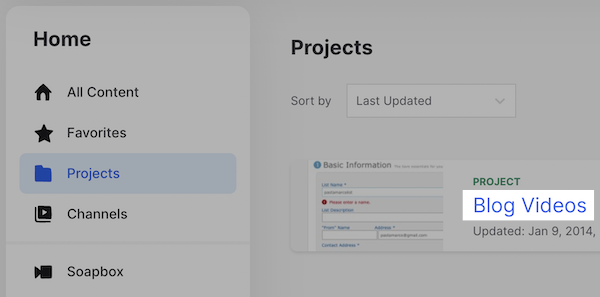
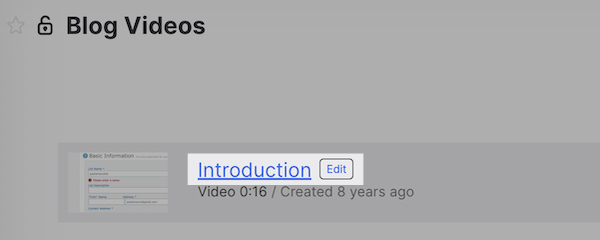
To get a form onto the video you uploaded, first go to the projects link in the side bar menu. Select the project with the video that you would like to place a form onto. In this example, we are choosing our Blog Videos project (your project may be named differently).
-
Next, click the title of the video that you want the form to be placed on. In this example we are clicking our "Introduction" video.
-
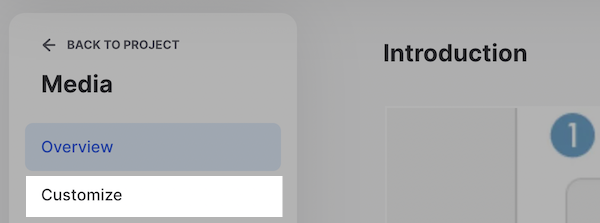
Click "Customize" on the sidebar menu.
-
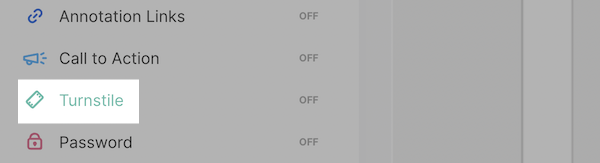
To the left of the video, a menu will appear with different toggles to click. All of these options are toggled off. Click Turnstile".
Another menu will appear with options for how you would like the form to function. The first option allows you to customize when the form will appear. The default time is set for the beginning of the video, but you can input a more specific time in minutes and seconds.
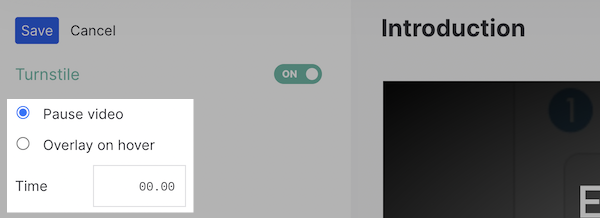
Once you select when you want the form to display, you can select if you want viewers to provide their first and last name or simply their email address. You can click the "Ask for first and last name" checkbox if you want viewers to input their names.

You can then select if you want viewers to be able to skip the form or not by clicking the next checkbox. This means that they will either need to fill out the form to continue watching the video, or they can simply skip past the form without needing to fill it out.

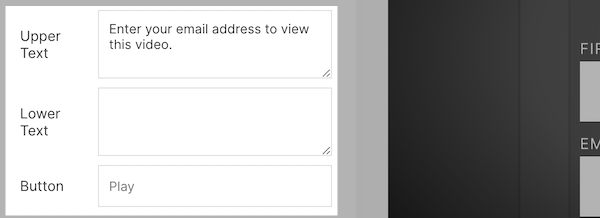
Below that option you will see text boxes where you can type what text you want to appear above and below the input field for the form as well as what the button text reads.
-
Next, choose the AWeber list you would like subscribers to be added to.

-
Once you are finished with configuring the settings for your form, click the "Save" button at the top of the page.

Now you are all setup! That video will now have a form that appears on it that viewers can fill out so that they can subscribe to your mailing list.