
WebinarNinja is a platform that provides you with the ability to create, host, and share webinars. You can manage your recordings, customize content, and share your screen with attendees to provide the best video experience possible. With the AWeber integration, people who sign up for an upcoming webinar will be added to your mailing list. You can follow up and provide them with reminders as well as additional content.
In this article, we will walk through how to connect WebinarNinja to your AWeber account.
Step By Step Instructions
-
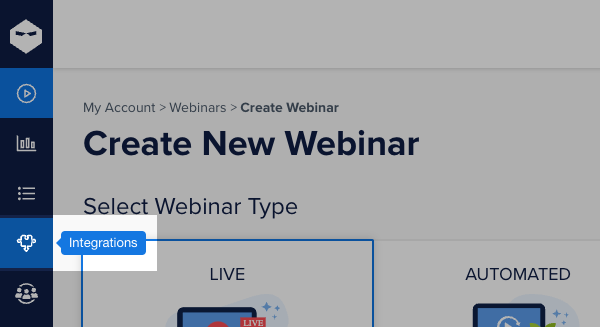
After logging into WebinarNinja, select the "Integrations" button from the menu options on the left-hand side of the page. This button looks similar to a puzzle piece.
-
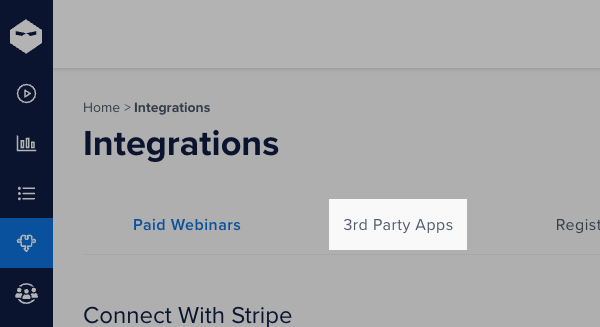
Then, click the "3rd Party Apps" tab.
-
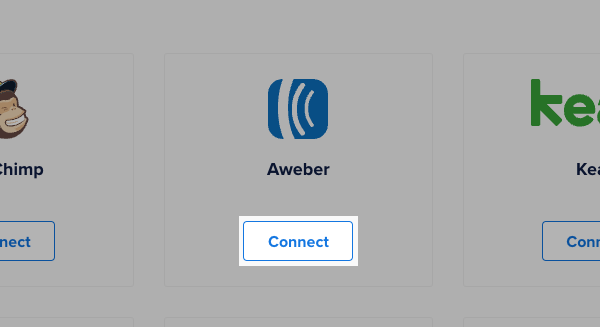
Click "Connect" under the AWeber icon.
-
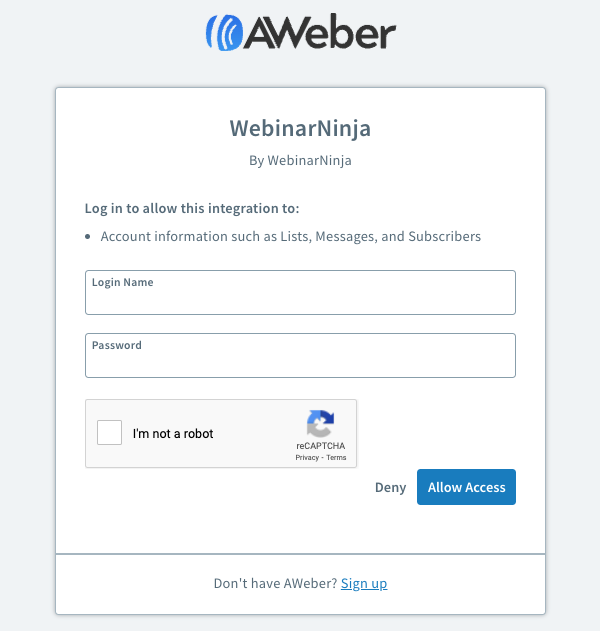
After clicking "Connect," allow WebinarNinja to access your AWeber account information, including your lists, messages, and subscribers. Enter your login credentials and click "Allow Access".
-
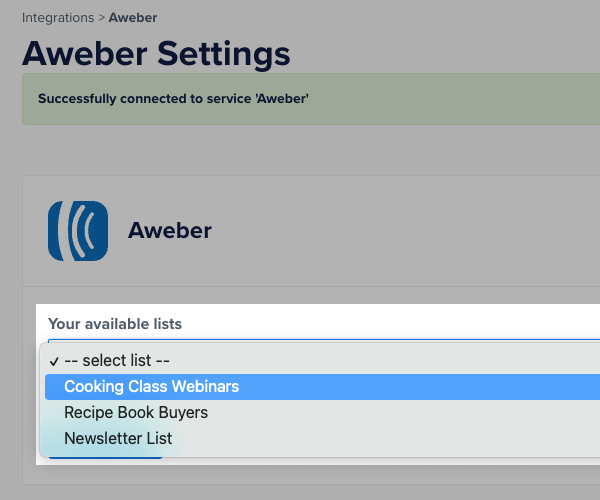
Once you authorize the integration, select the list you would like to connect to from the "Your available lists" drop down menu.
-
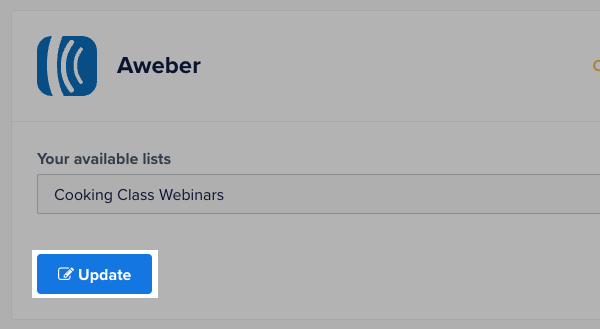
Once you've selected your list, click "Update".
And that's it! Congratulations, you've successfully connected AWeber to WebinarNinja. Whenever a subscriber signs up for your webinar, they'll automatically be added to your list as well.