
Sending a broadcast to a segment of your subscribers allows you to deliver more personalized and relevant content. By targeting specific groups based on tags, behaviors, or other attributes, you can increase engagement, improve open and click-through rates, and reduce unsubscribes. Segmentation helps ensure your message reaches the right people at the right time; making your email marketing more effective and impactful.
Note: Saving custom segments is not accessible on the AWeber Free plan. To gain access to unlimited custom segments, upgrade to the Plus plan.
Key Terms
-
Broadcast: A one-time email message sent to a list or segment of subscribers, typically used for newsletters or announcements.
-
Segment: A saved group of subscribers defined by specific criteria, such as tags or engagement metrics, allowing targeted messaging.
-
Tag: A keyword or phrase assigned to subscribers to categorize them based on actions, interests, or sources, facilitating targeted campaigns.
Scheduling a Broadcast to the Segment
1. Save a custom segment
2. Access the Schedule Menu
-
Navigate to the Messages tab.
-
Locate the message you wish to send and click Schedule.

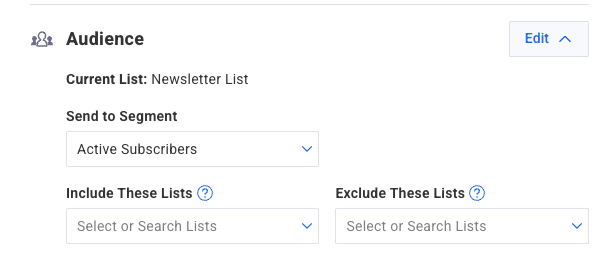
3. Select the Segment
-
Under the Audience section, click the “Edit” button.
-
From the Send to Segment dropdown, select your saved segment.
-
Optionally, include or exclude additional lists as needed.
Note: If sending to a segment and including additional lists, the segmenting rule applies to those included lists as well; only subscribers matching the segment criteria across all included lists will receive the message.
Once you make any other changes to scheduling and social sharing, you can schedule your broadcast as usual.