
Deadline Funnel gives you the ability to create custom product launch and evergreen timers tied to your campaign. With the AWeber integration, you'll be be able to add that timer right inside of your HTML emails.
In this article, we'll cover how to integrate your Deadline Funnel account directly to AWeber and how to add your countdown timer to your AWeber message.
Step By Step Instructions
-
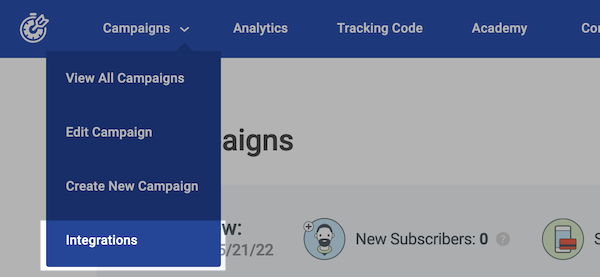
First, you will need to connect Deadline Funnel to your AWeber account. To do this, click the "Campaigns" tab and select "Integrations".
-
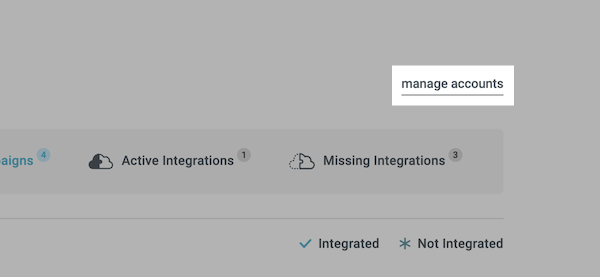
From the "Integrations" page, click "manage accounts".
-
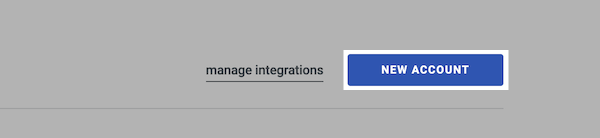
Click the "NEW ACCOUNT" button.
-
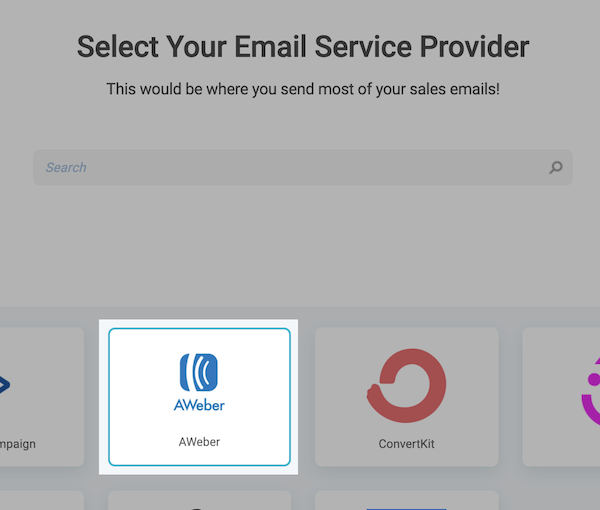
Then, select AWeber from the list of available integrations and click "Next."
-
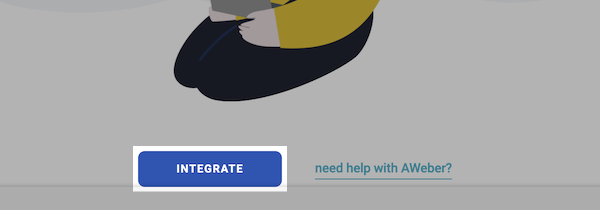
Next, click "INTEGRATE."
-
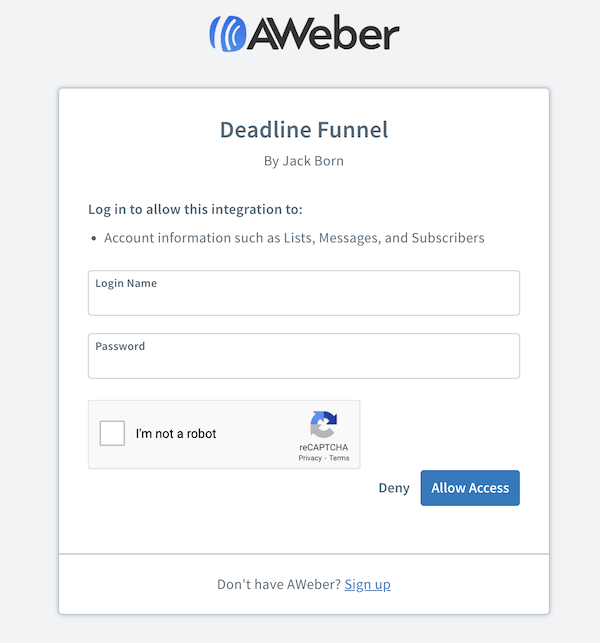
Next, allow Deadline Funnel to access your AWeber account information, including your lists, messages, and subscribers. Enter your login credentials and click "Allow Access."
-
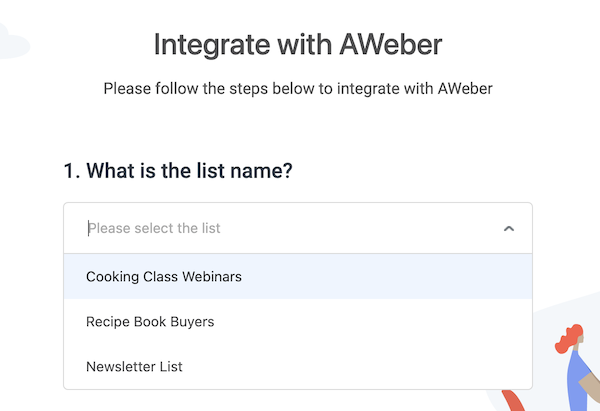
After you authorize the integration, you will be brought to the setup page to finish configuring the integration. Select the the list that you want Deadline Funnel to track from the drop-down menu.
When subscribers are added to this list, Deadline Funnel will track the date that they were in added in relation to the deadline of your campaign.
-
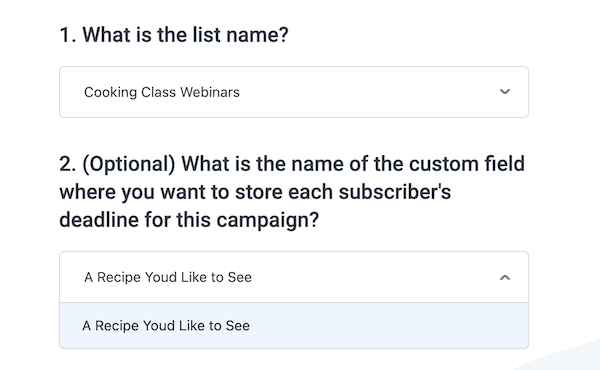
Then, select the custom field in AWeber where you would like to each subscriber's deadline to be displayed.
-
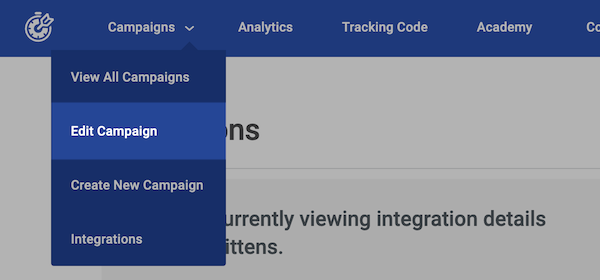
To access the code for your countdown timer, you will then need to hover over "Campaigns" and click "Edit Campaign" from the options at the top of the page.
-
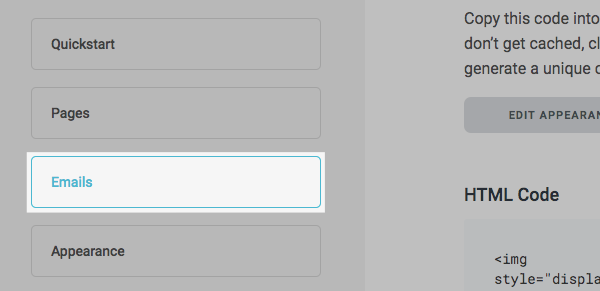
Select the "Emails" tab.
-
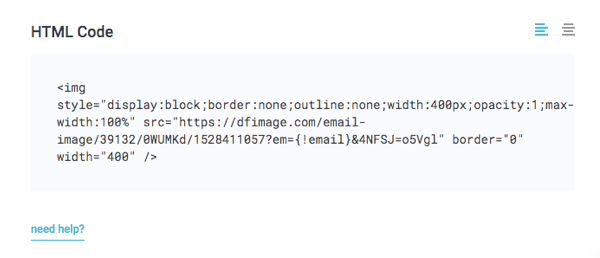
Click on the "HTML Code" section to automatically copy your timer code.
-
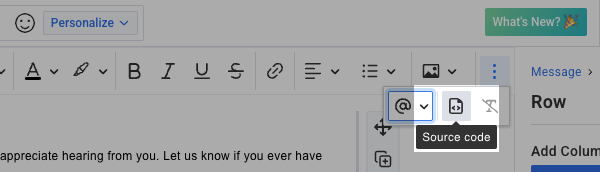
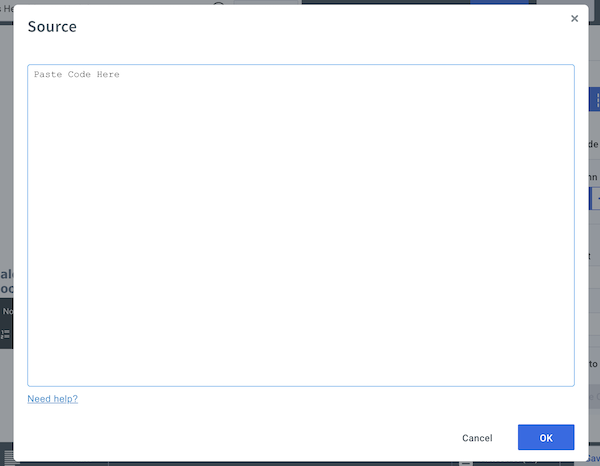
Now, in AWeber, you can create a message using the Drag & Drop Email Builder or edit an existing message to include this code. Click the text area where you would like to add the timer and click the source code icon from the formatting bar at the top of the screen.
-
Place your code where you would like it to appear in the message and then click "OK" once complete.
-
After your click "OK," the timer will display in your message.
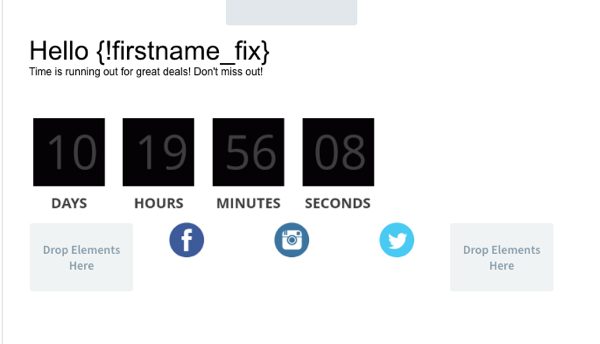
And that's it! Congratulations, you have successfully integrated your account with Deadline Funnel and added a timer to your message!